
How to Easily Connect Shopify with Webtune AI?

Explore the power of Shopify and Webtune AI for a compelling e-commerce journey.
In the rapidly changing world of e-commerce, having a strong online presence is crucial. Shopify is a robust platform that enables businesses to build and grow their digital presence.
However, achieving high performance and visibility on search engines requires attention to detail beyond the surface. It is where the combination of Shopify and Webtune AI can be incredibly effective.
From efficient fixes to meticulous optimization, this collaboration empowers users to fine-tune their websites, ensuring visibility and a compelling digital experience for their audience.
Want to know how you can connect Shopify with Webtune AI for an enhanced e-commerce journey? Here’s how -
Step 1 - Start with analyzing your domain with Webtune AI
1. Navigate to Webtune AI ( https://app.webtune.ai/ )and enter your domain in the input box given on the page. Then, click on ‘Get Started’.

2. We will find the total pages in your domain and analyze the issues in them as per your current page limit.
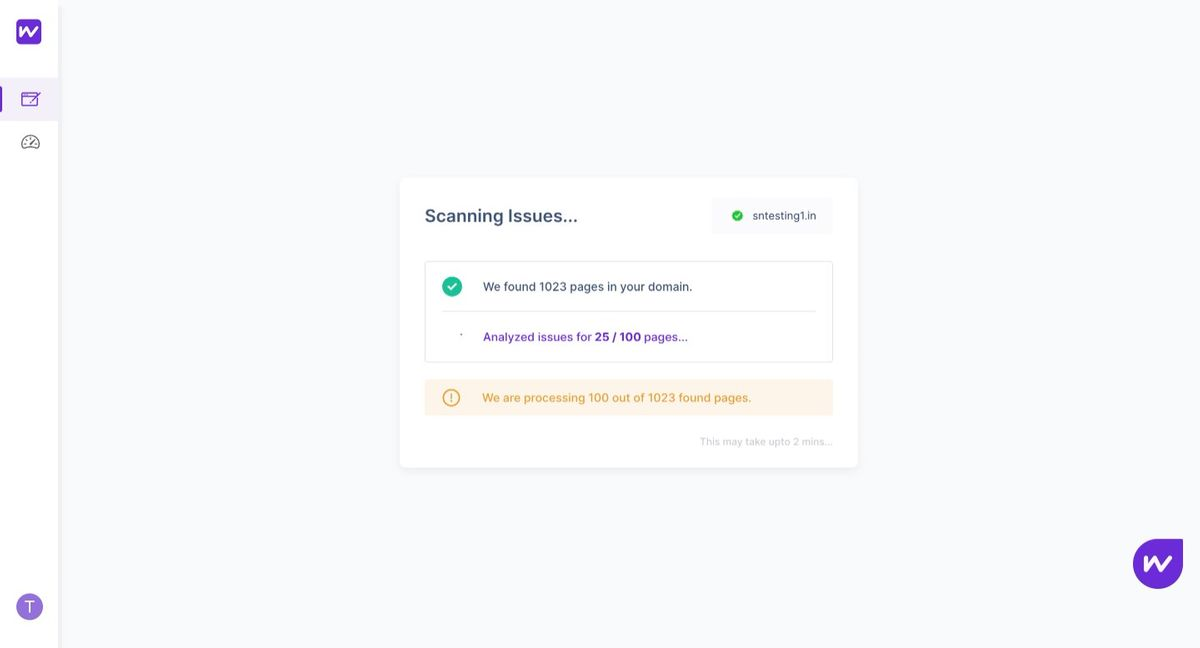
Webtune AI will start to analyze your pages. Once done, you will be navigated to the Webtune AI dashboard.
Please note: You can view all the issues for the pages, but cannot review the changes or make them live on the site. To do so, you need to connect your domain with Webtune AI.
Step 2 - Get the script from Webtune AI
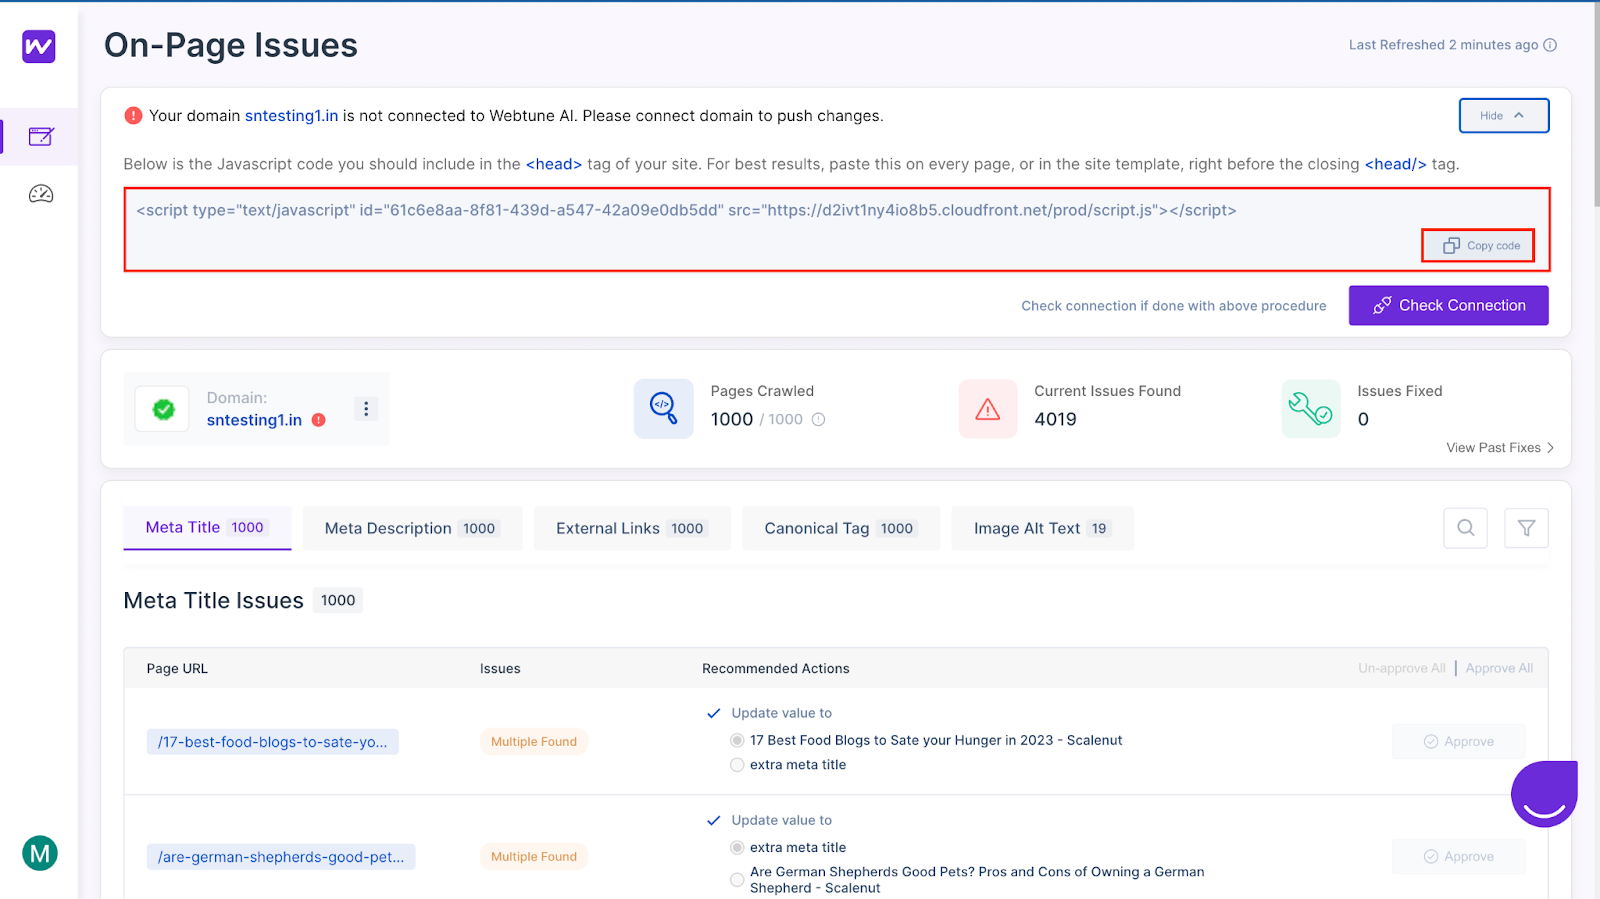
- Navigate to Webtune AI dashboard where your domain’s current issues are listed
- For viewing more than 5 issues, or approving the changes, you will need to first verify your domain
- For verifying, click on the Connect Domain button given in the red section (2nd section from top)

4. On clicking the above, you will be able to see the script which you need to add to your domain. Then, copy the script using the ‘Copy code’ button given.
5. Now paste the code in your head section of the page/template
Step 3 - Add the script in the <head> section of your page.
- Navigate to Online Store > Themes
- Find your theme, select the Actions drop-down/3 dot ellipsis button
- Select Edit Code from the drop-down

4. You will be navigated to the Theme Editor page
5. Find the theme.liquid file (under Layout). Click on the file
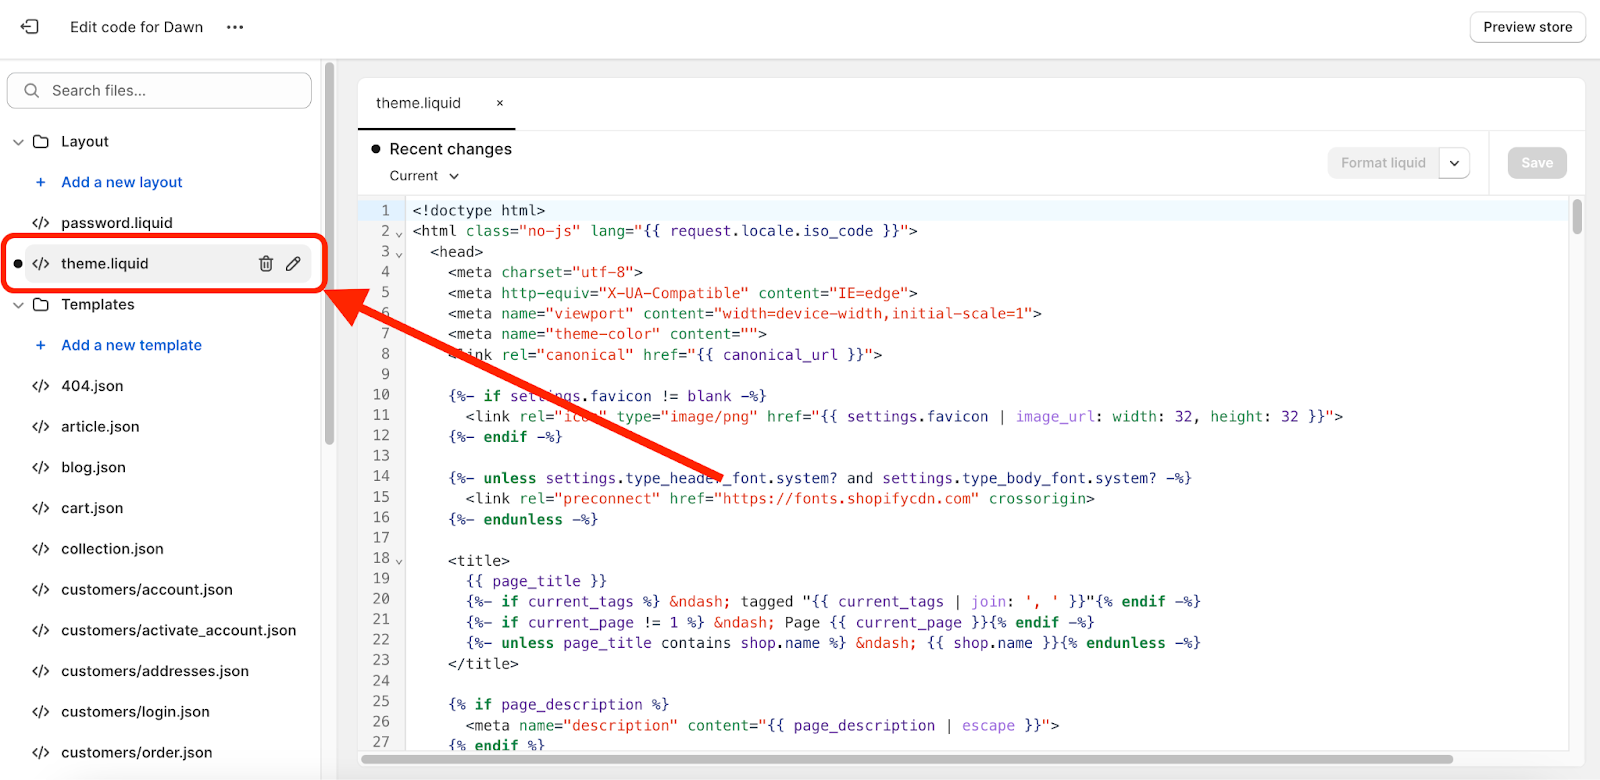
6. In your theme.liquid file, hit CMD + F (Mac) or CTRL + F (Windows) to open up a search bar
7. Enter </head> in the search
8. Be sure to include the / in </head>, without the / is <head> and this is the opening tag. If you put code above this, it won't work.
9. This will take you to the closing tag, or the end of the <head> section of your code. Generally, you want to put all your scripts, just above this closing tag.
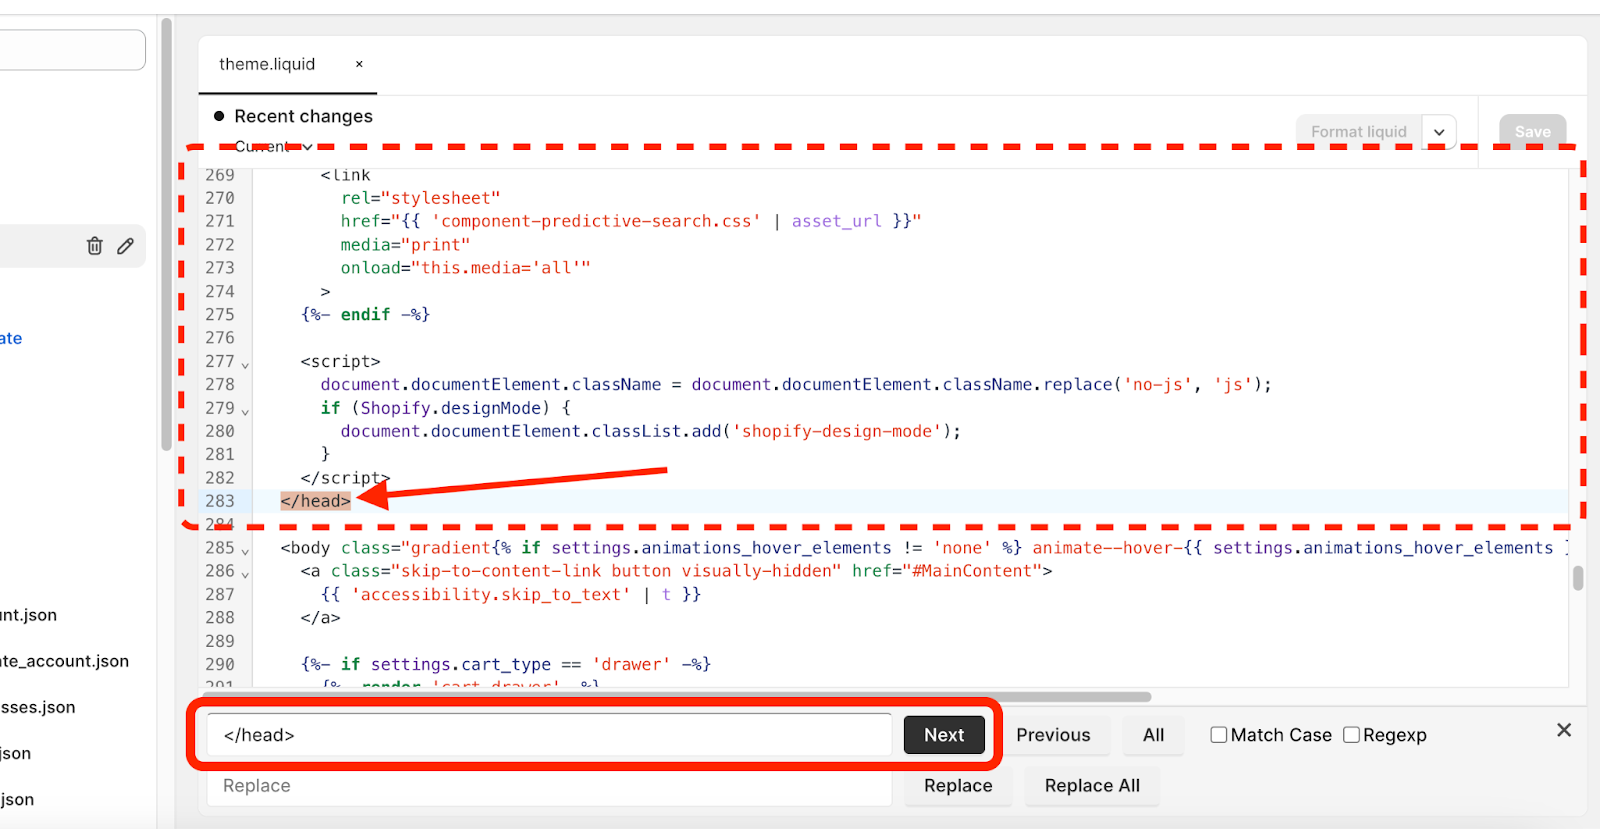
10. Add the script by copy and pasting it on the line directly above the </head> tag.
11. If there's code directly above it, just add in extra lines between them with the ENTER or RETURN key.
12. Ensure you don't overwrite, or remove any other little bits of code. Removing a single < or > accidentally can actually cause the code (ie. your site) to no longer function.
13. Hit Save

14. You can also click on the 'Current' drop-down that appears at the top if you need to rollback to a previous version of this file, in case something goes awry. Just select the Original one if you want your default version.

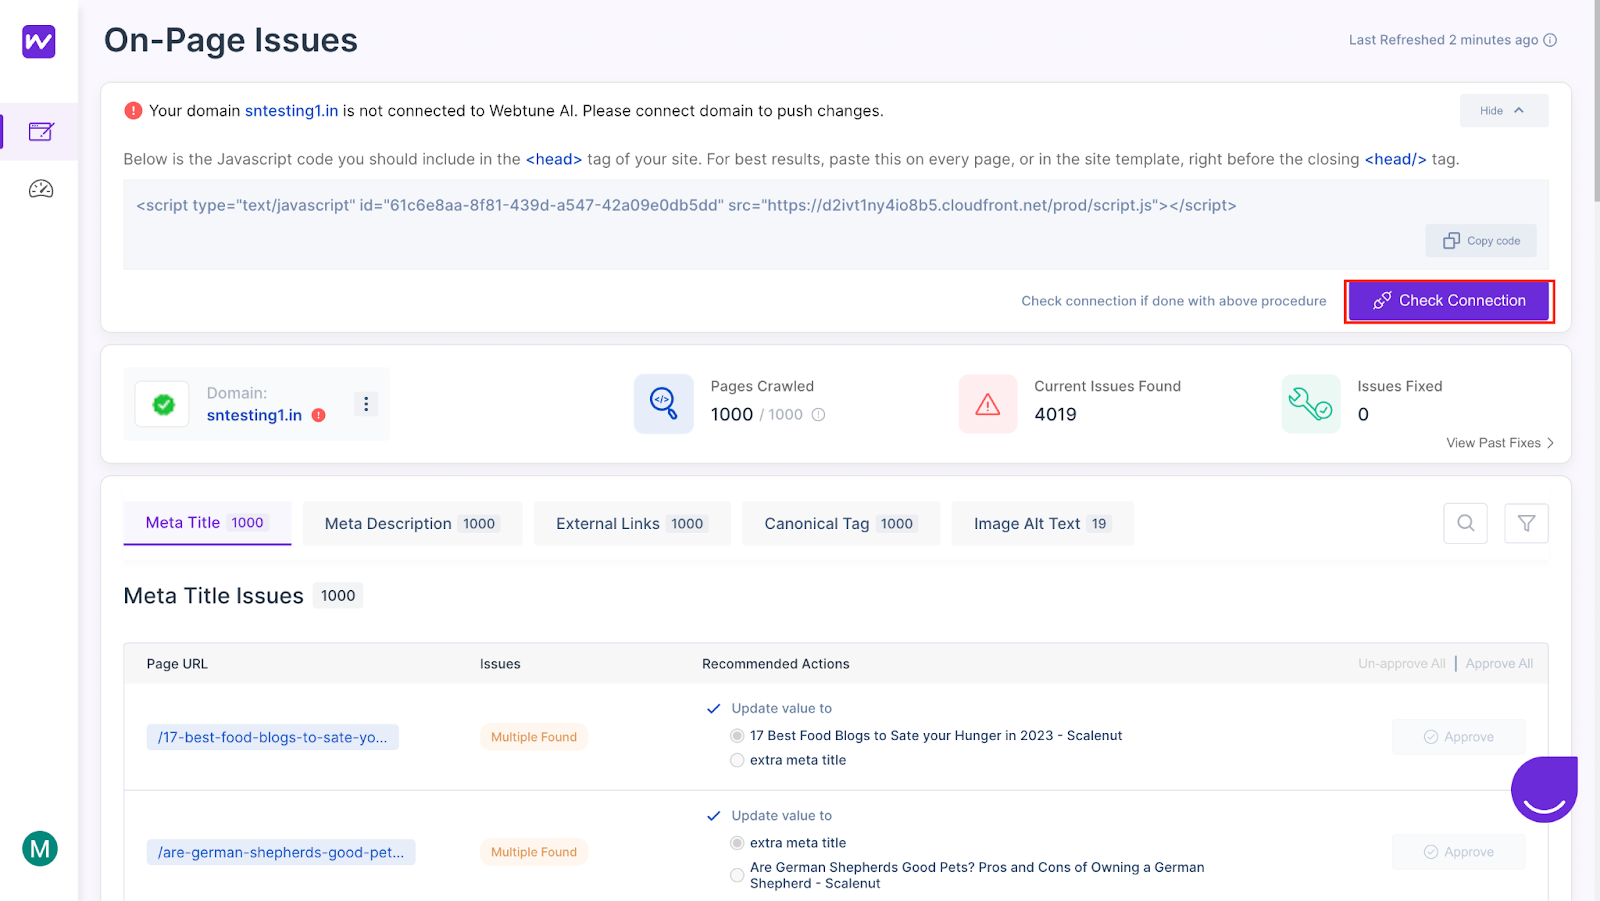
15. Now you can verify the connection by going to the Webtune AI dashboard and clicking on “Check Connection” button. If it gets verified, a success message will be displayed and the recommendations generation process will start.
16. After the recommendation process gets completed, you will be navigated to the dashboard again where all your issues and their recommendations will be displayed.