Webtune AI: Your Ultimate Website Performance Optimizer
Unleash your site's full potential with the advanced tools of Webtune AI.
Webtune AI provides a simple 3-step process that allows businesses to easily review, approve, and implement SEO changes on their websites.
In addition to improving website rankings on search engines, Webtune AI also enhances user experience.
Want to know how to leverage Webtune AI to get immediate results without needing technical skills? Here’s how.
STEP 1
Once you create your account, you’ll receive a verification email at your registered email address. Click on ‘Confirm Email Address’ to verify your account.

STEP 2
On the redirected link, enter your domain and click on ‘Get Started’

STEP 3
In this step, we will find the total pages in your domain and analyze the issues in them as per your current page limit.
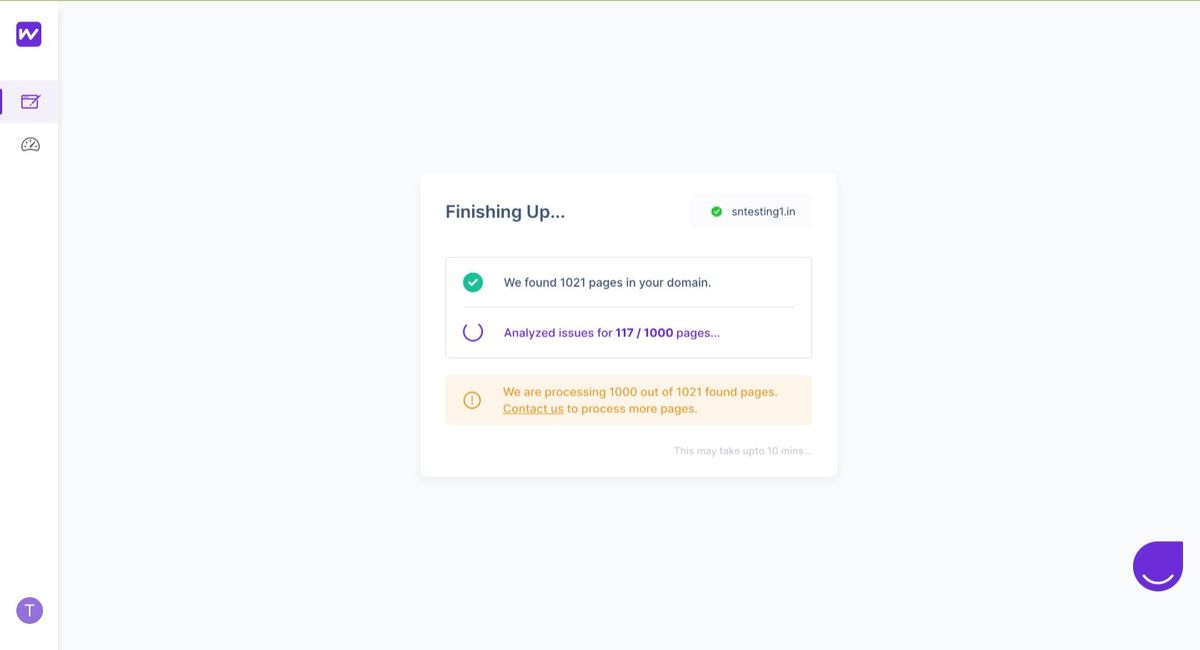
Please note: In this case, the page limit on your account is 1000 pages. So even if you have more pages in the domain, the system will only optimize 1000 of them as per the limit.
STEP 4
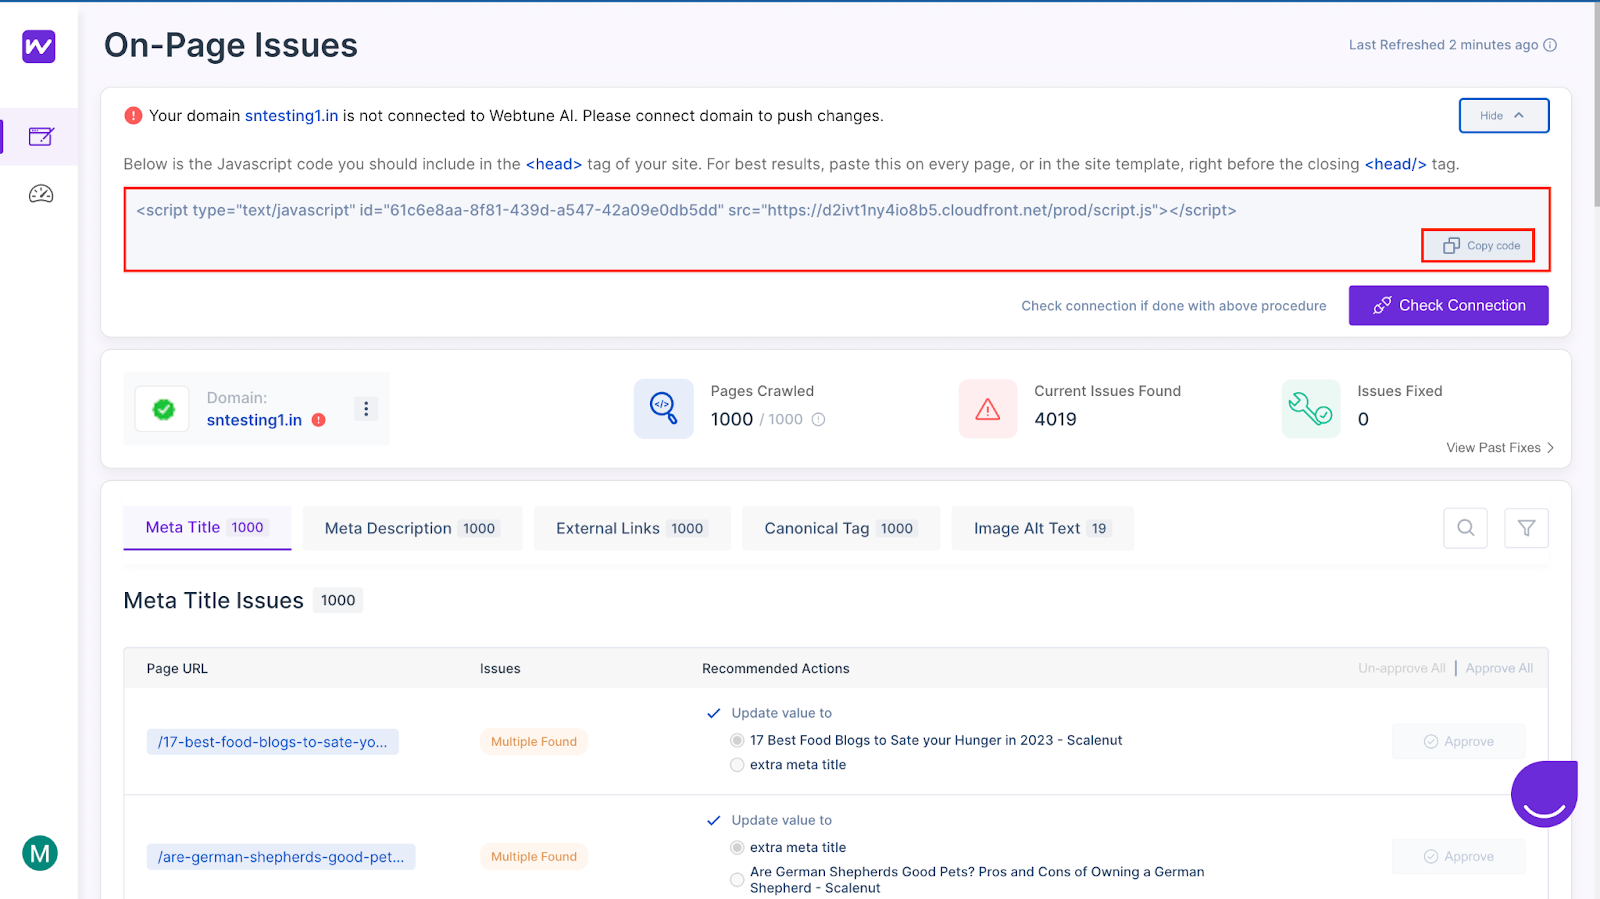
Next, you can view all the issues for the pages, but cannot review the changes or make them live on the site. To do so, you need to connect your domain with Webtune AI.
What is a domain? Domain refers to the unique name that identifies a website. It serves as a human-readable address that allows people to access a specific location on the internet.
STEP 5
Begin by clicking on ‘Connect Domain’.

STEP 6
Now, copy the given code and paste it into your metadata.
STEP 7
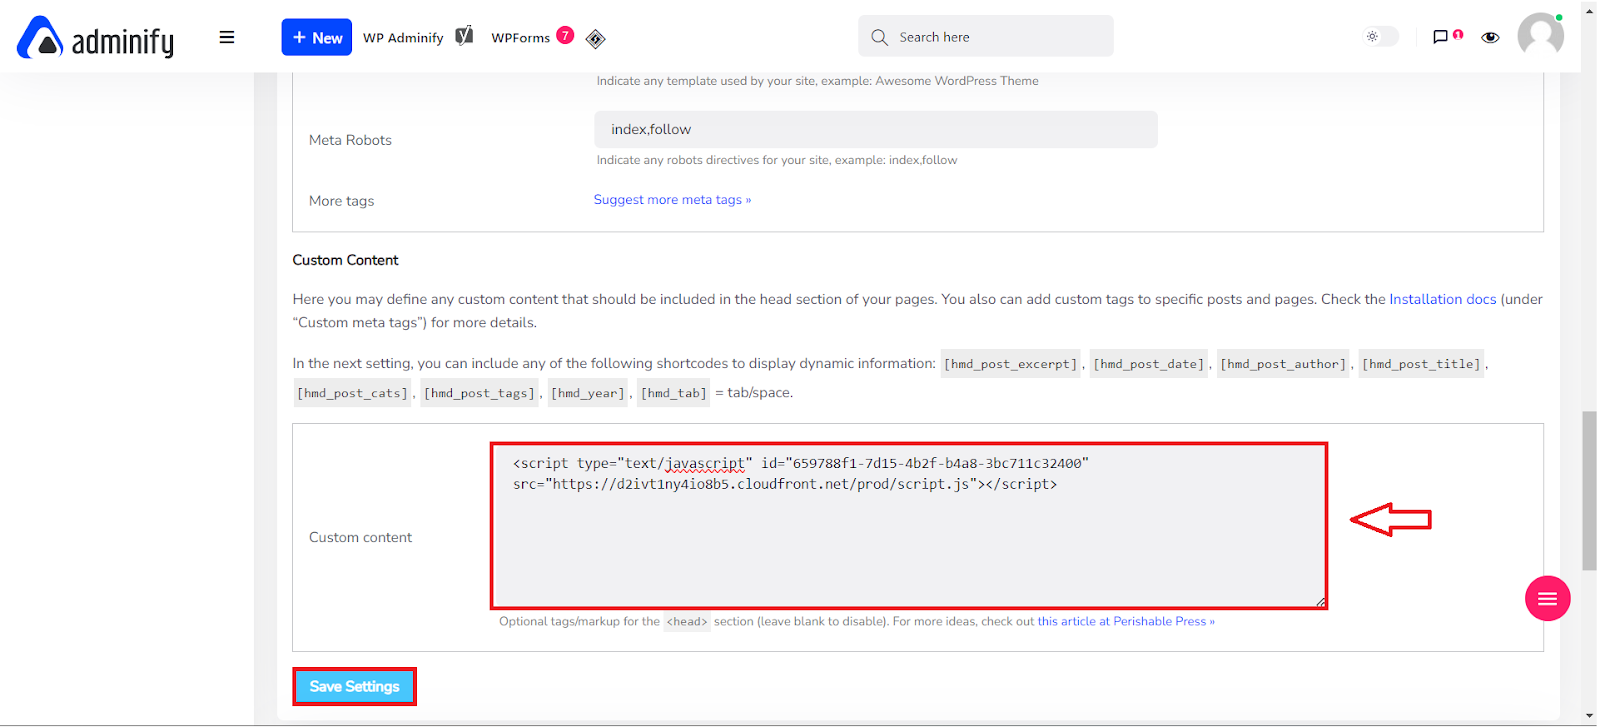
In case you are using WordPress, then Go to settings > Meta Head Data. Next, paste the copied code into the custom content space and click on ‘Save Settings”.
STEP 8
Once the script is saved, head over to the Webtune AI page and click on ‘Check Connection’.
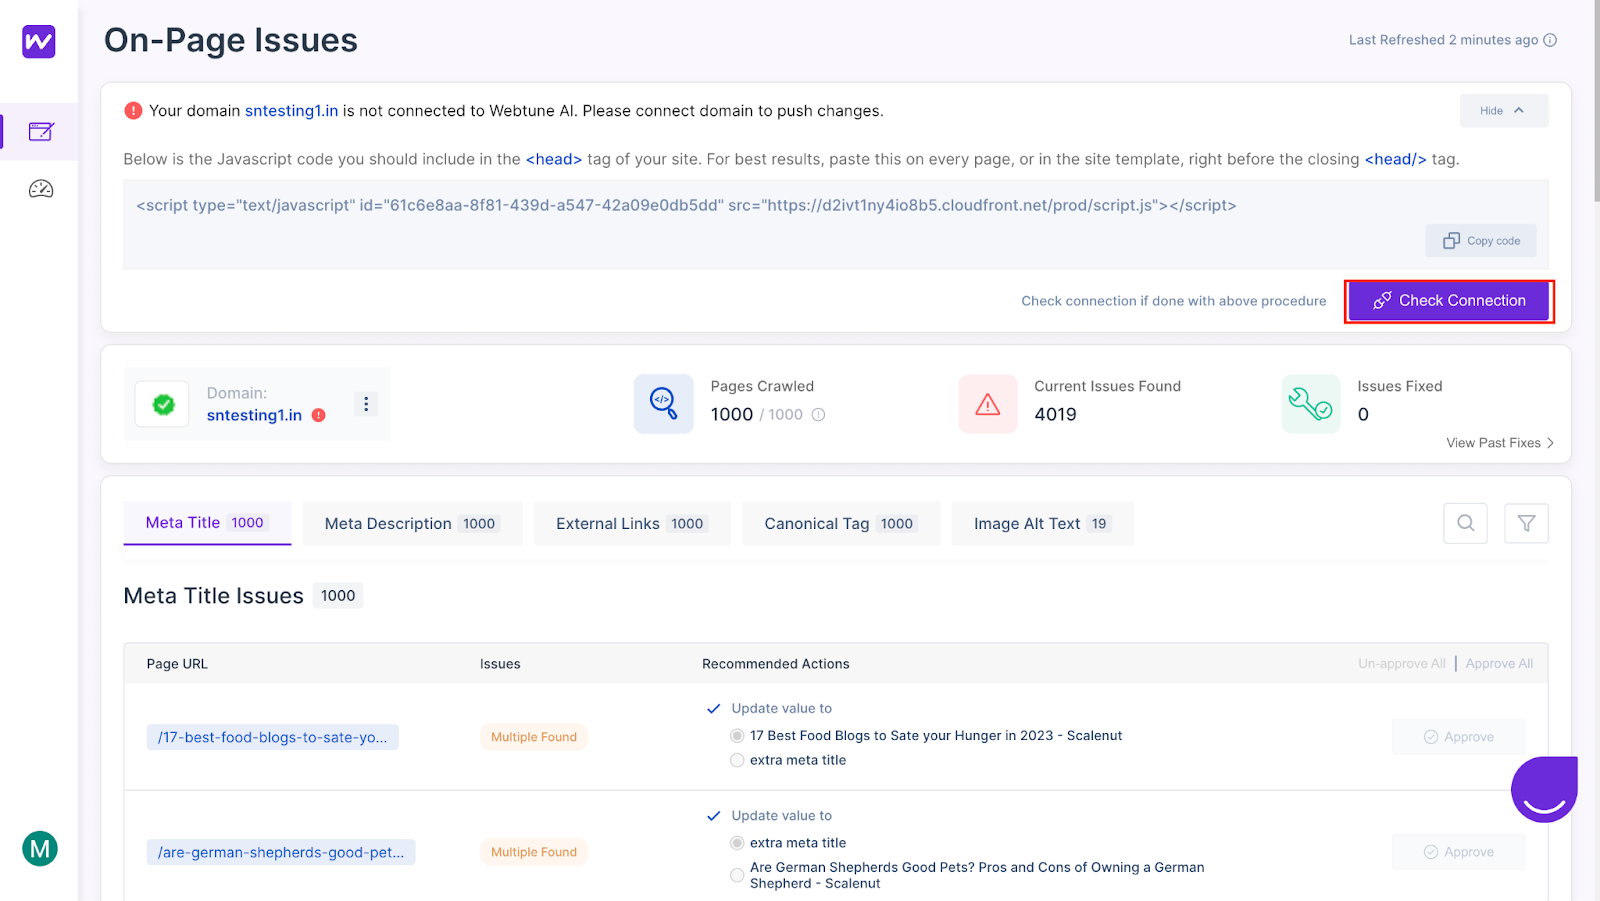
STEP 9
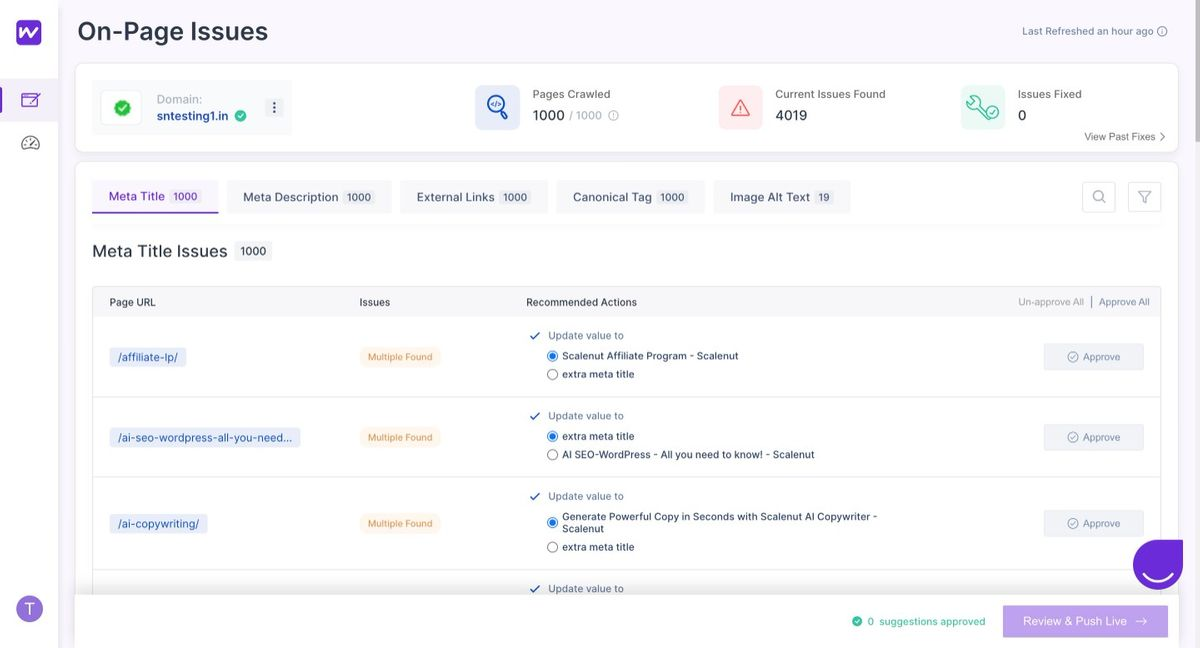
Once completed, this is how your screen will look like. You can now utilize Webtune AI to review, approve, and deploy SEO changes for websites effortlessly.
STEP 10
The first issue that Webtune addresses is ‘Meta Title’.
A meta title, also known as a title tag, is an HTML element that specifies the title of a webpage.
There are 4 kinds of Meta Title issues that Webtune aims to fix - Missing Meta Title, Empty Meta Title, Outside Head, and Multiple Found.

STEP 11
For example, let’s fix the ‘Missing’ issue for one of the Page URLs.
In that case, you need to add the new tag.

STEP 12
When you click on the + sign, you’ll find AI-generated ideas. You can either use them as-it-is or make edits to them.
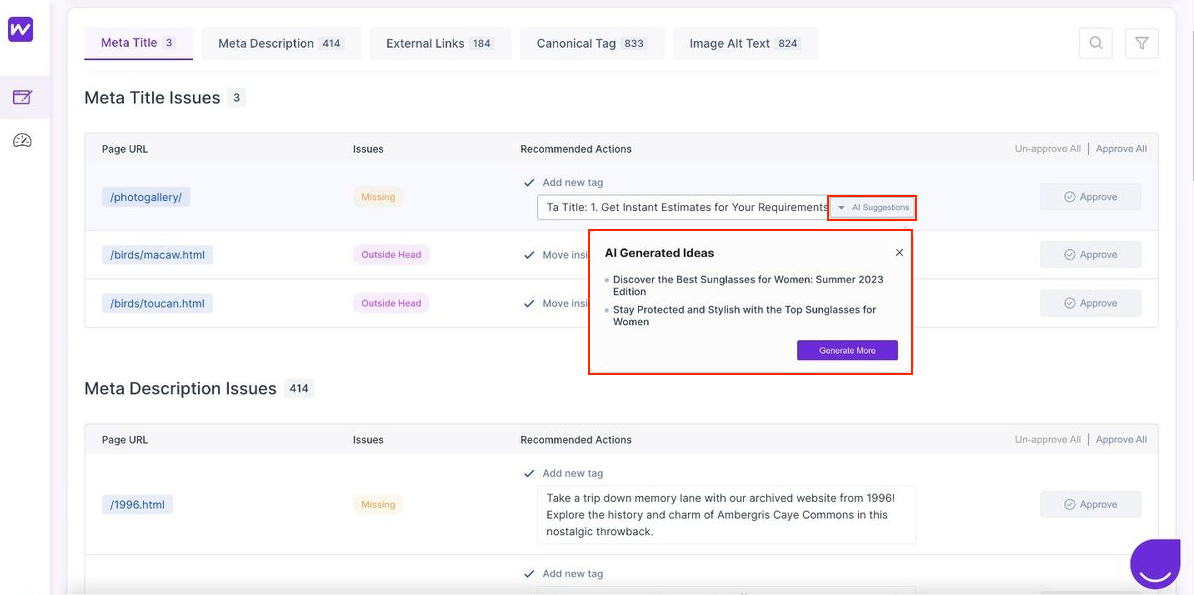
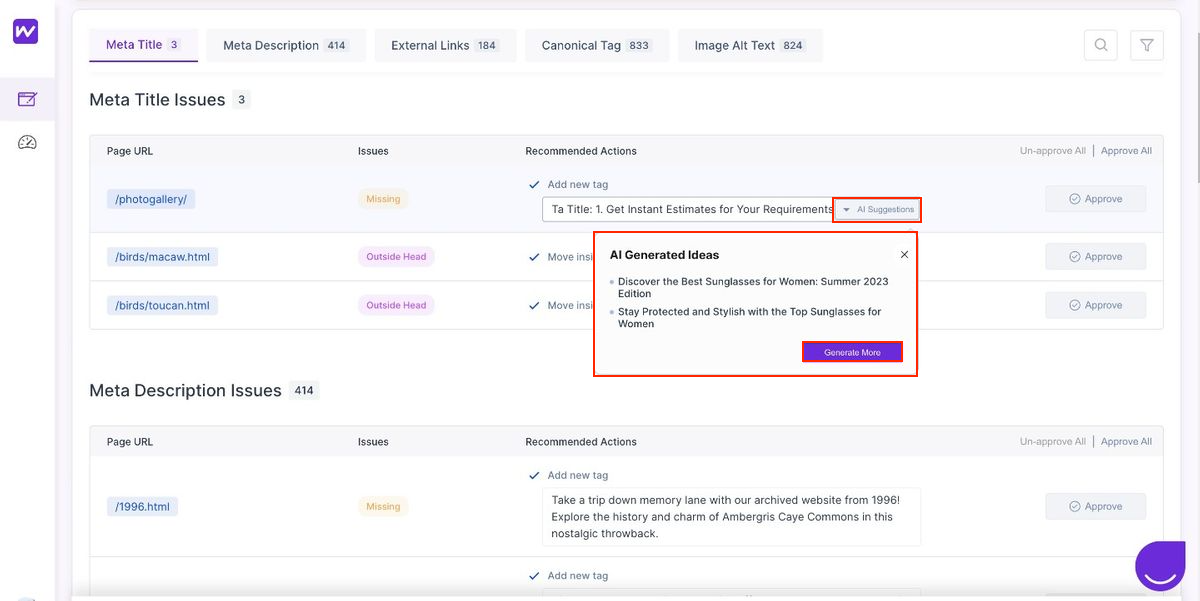
STEP 13
In case you like any output, simply click on it and it’ll get added for you. If you want to generate more options, click ‘Generate More’.
STEP 14
Click ‘Approve’
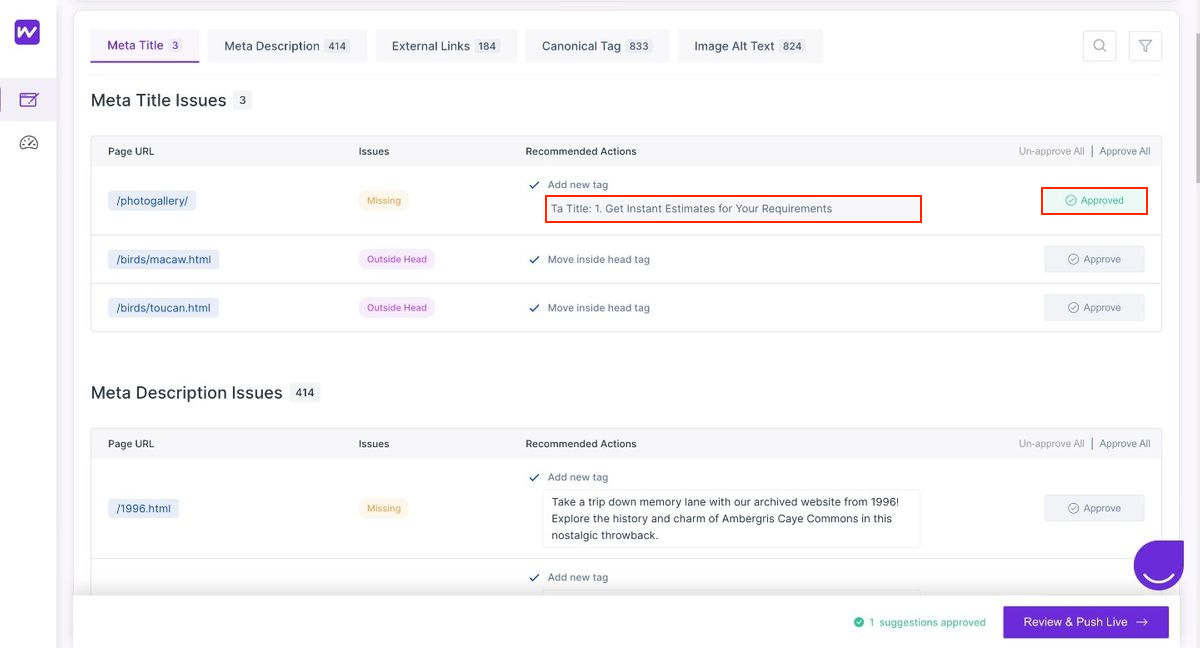
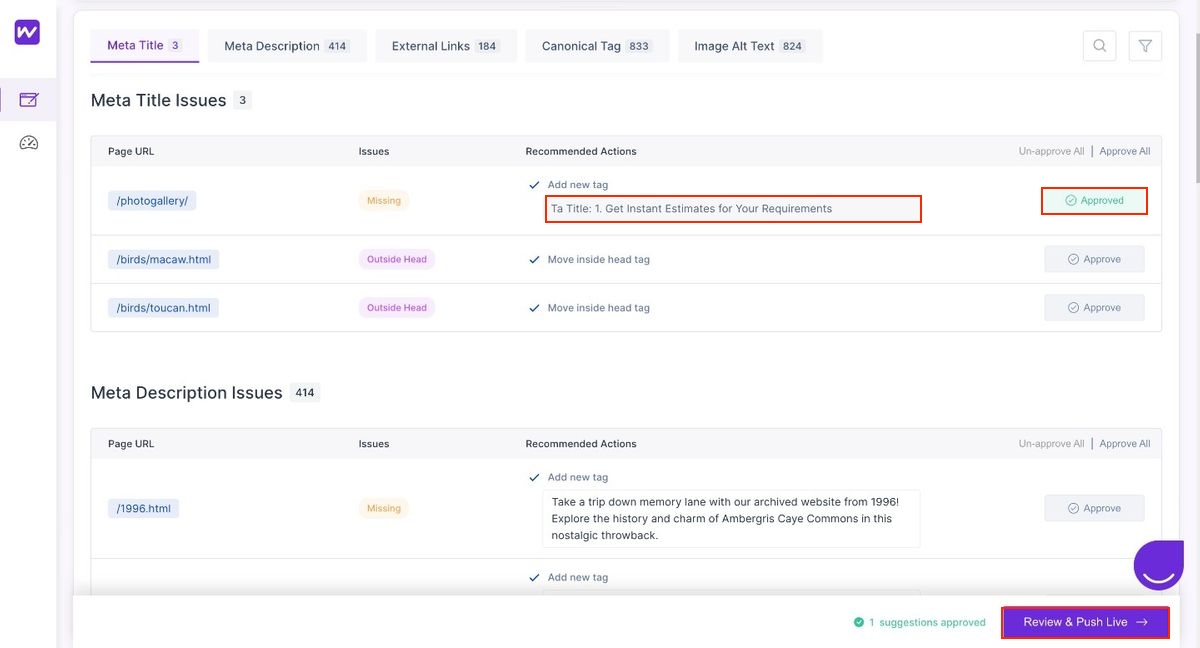
STEP 15
Click ‘Review and Push Live’
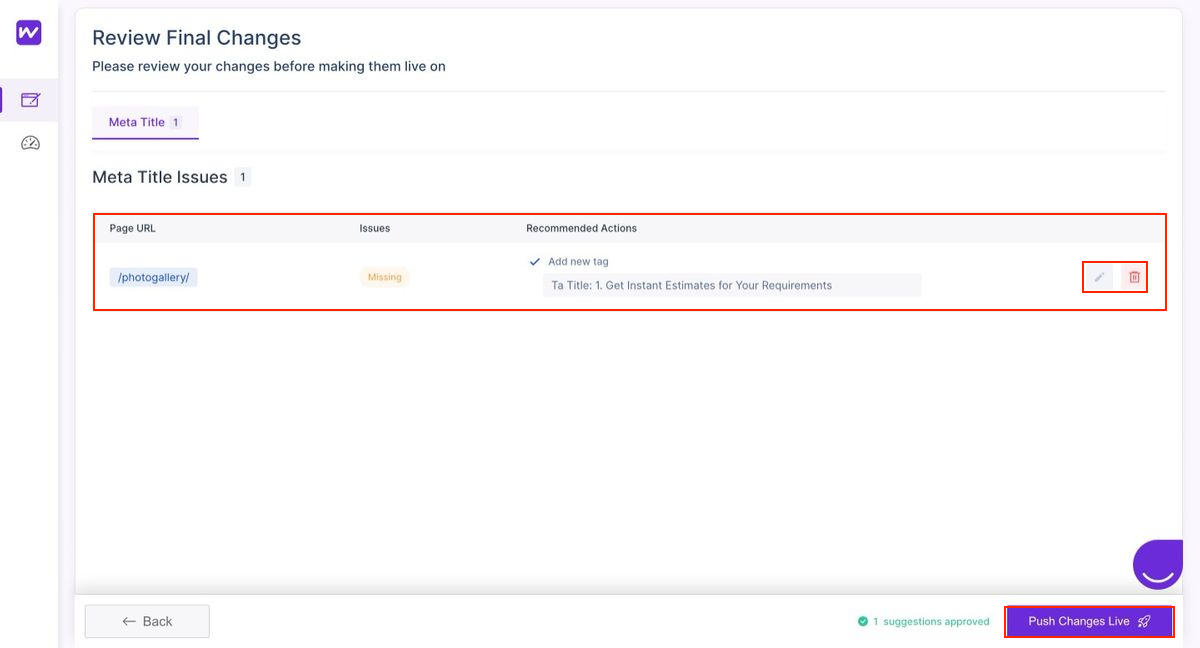
STEP 16
On the redirected screen, you can review your final changes. If needed, you can further edit it over here, or directly click on ‘Push Changes Live’.
Want to know how to fix the other 3 Meta Title issues? Read this dedicated article for the complete walkthrough. What Are Various Meta Title Issues and How to Fix Them?
STEP 17
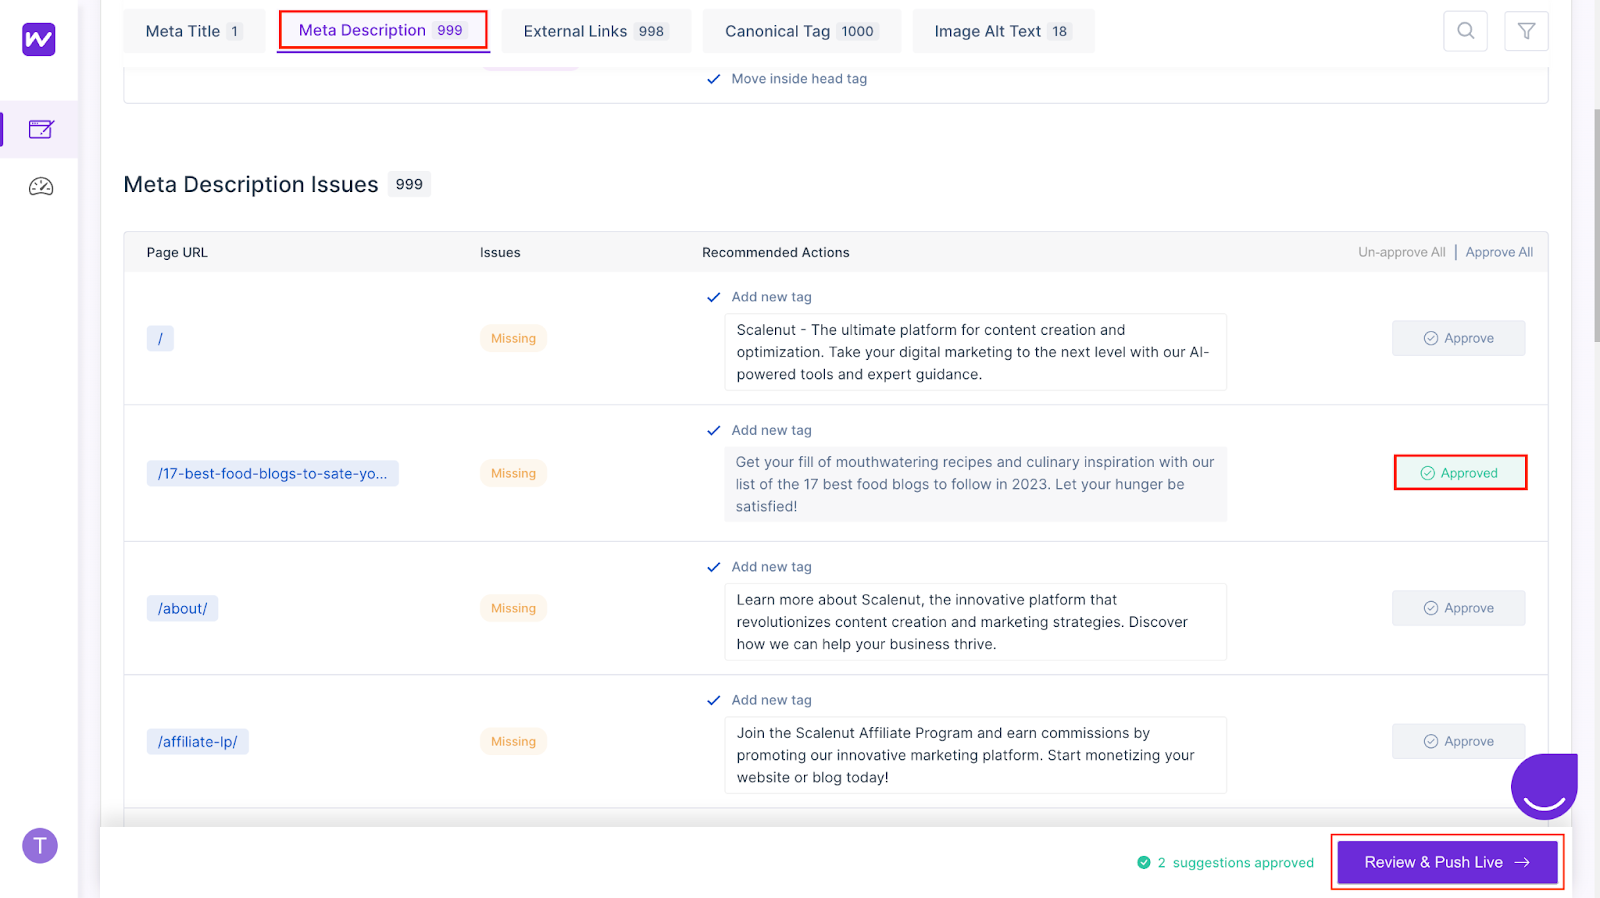
Now, move to the ‘Meta Description’ issues.
A meta description is a summary of a web page that is displayed on the search result page of a search engine.
Let’s fix the ‘Missing’ issue.

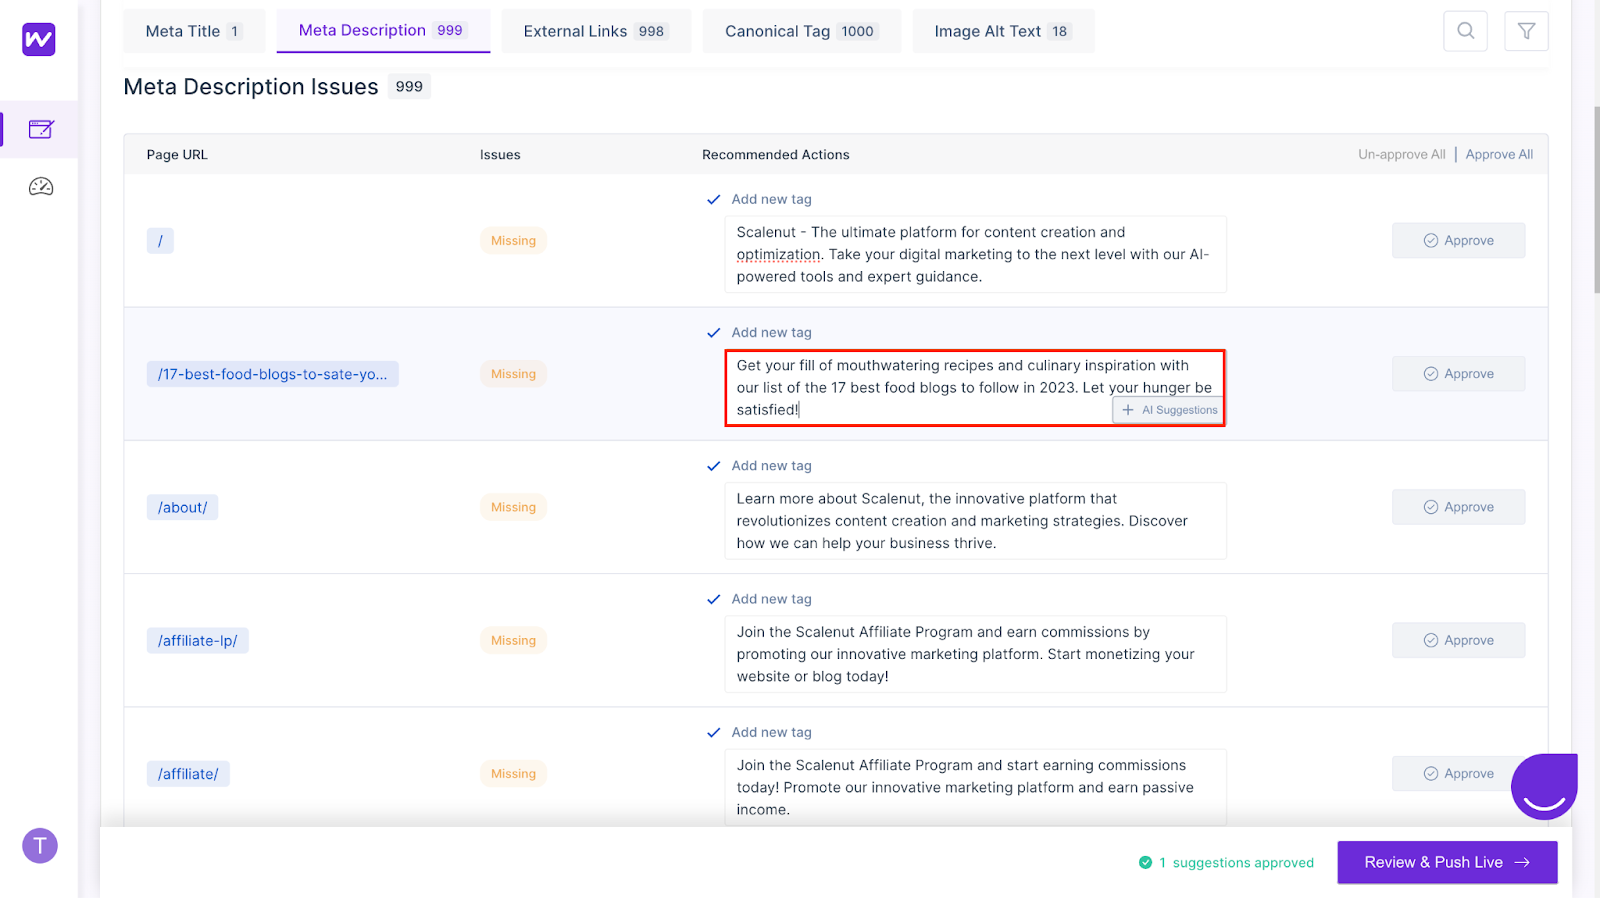
STEP 18
Click on the dialogue box and add the recommended action manually to fix your issue. Or, Click on the + sign. Here, you’ll be able to get the AI Suggestions.
STEP 19
Next, click on ‘Approve’

STEP 20
Click ‘Review and Push Live’
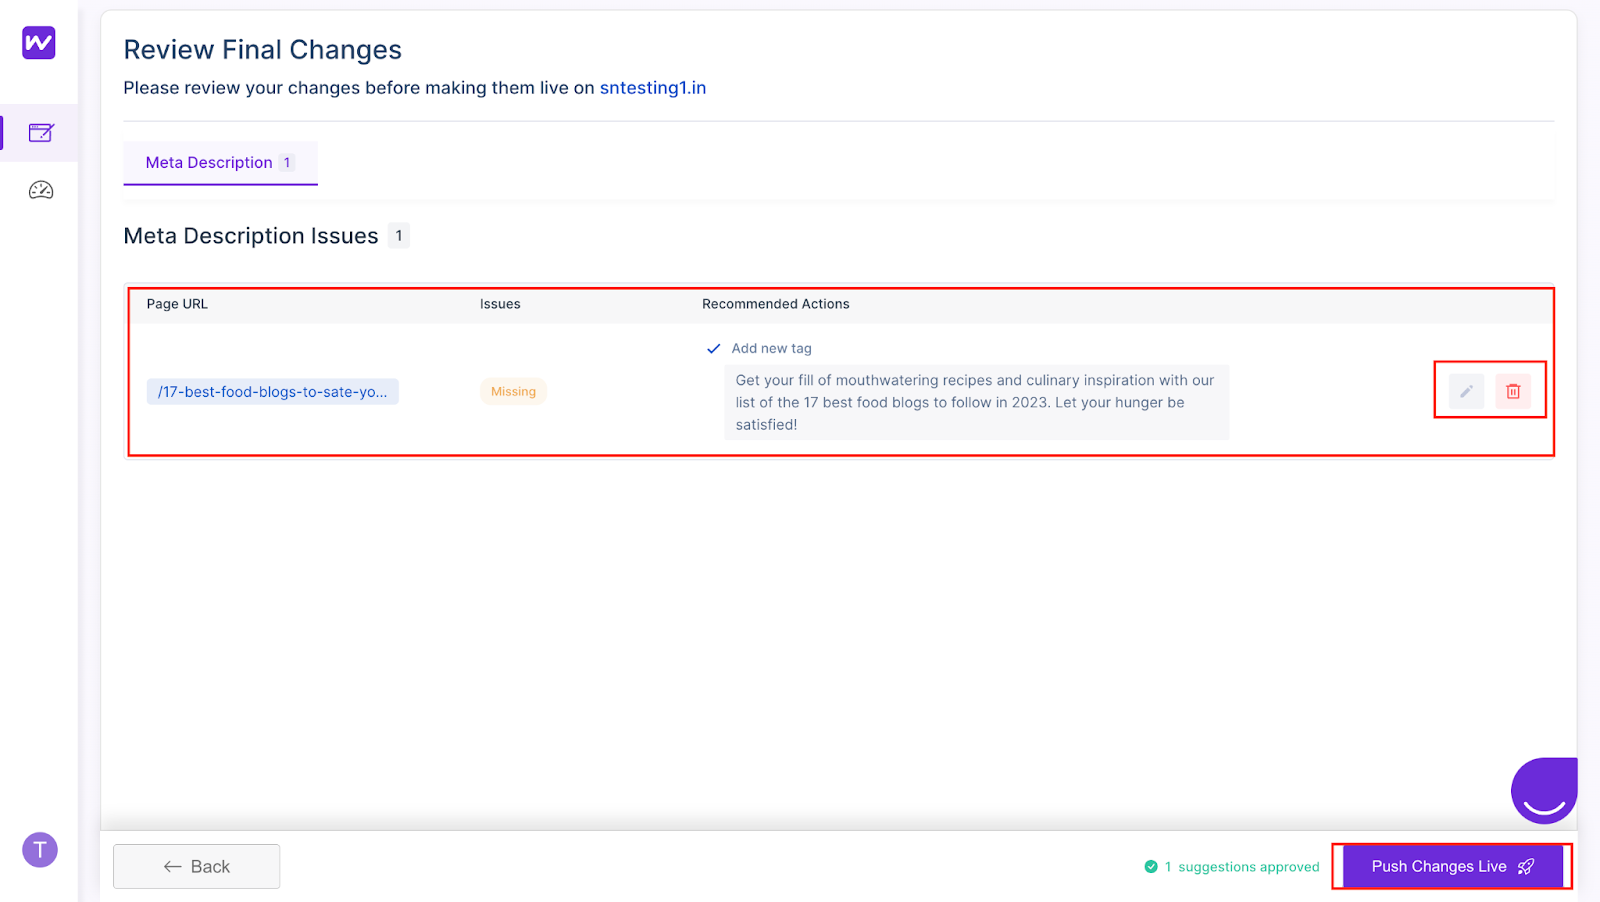
STEP 21
On the redirected screen, you can review your final changes. If needed, you can further edit it over here, or directly click on ‘Push Changes Live’.
Wondering how to fix the other 3 Meta Description issues? Read this dedicated article for the complete walkthrough. Solving Meta Description Problems with Webtune AI
STEP 22
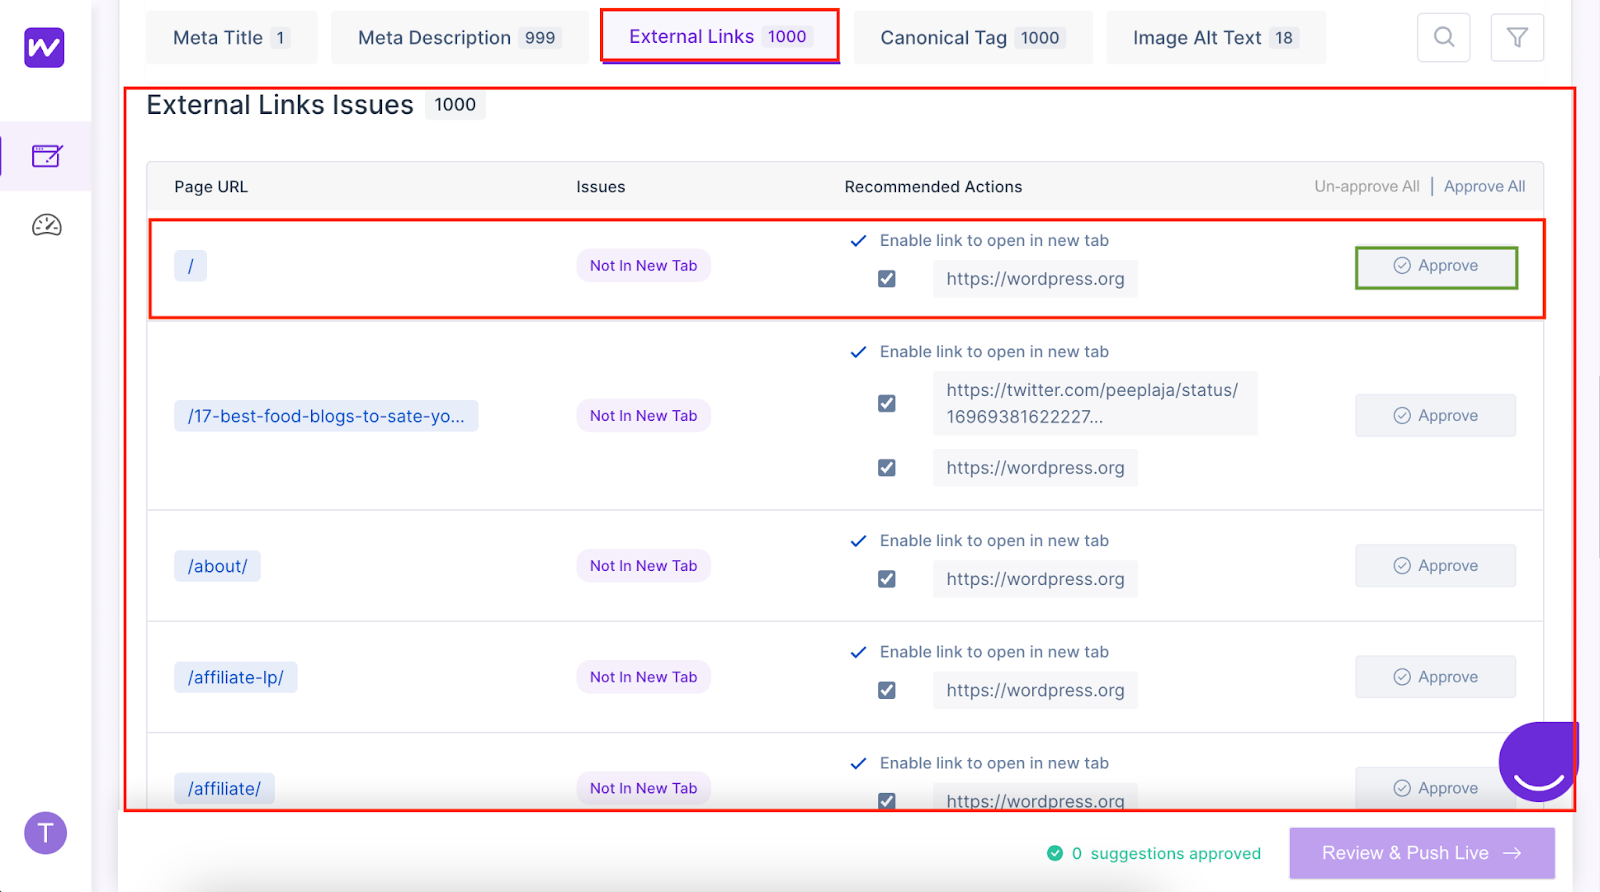
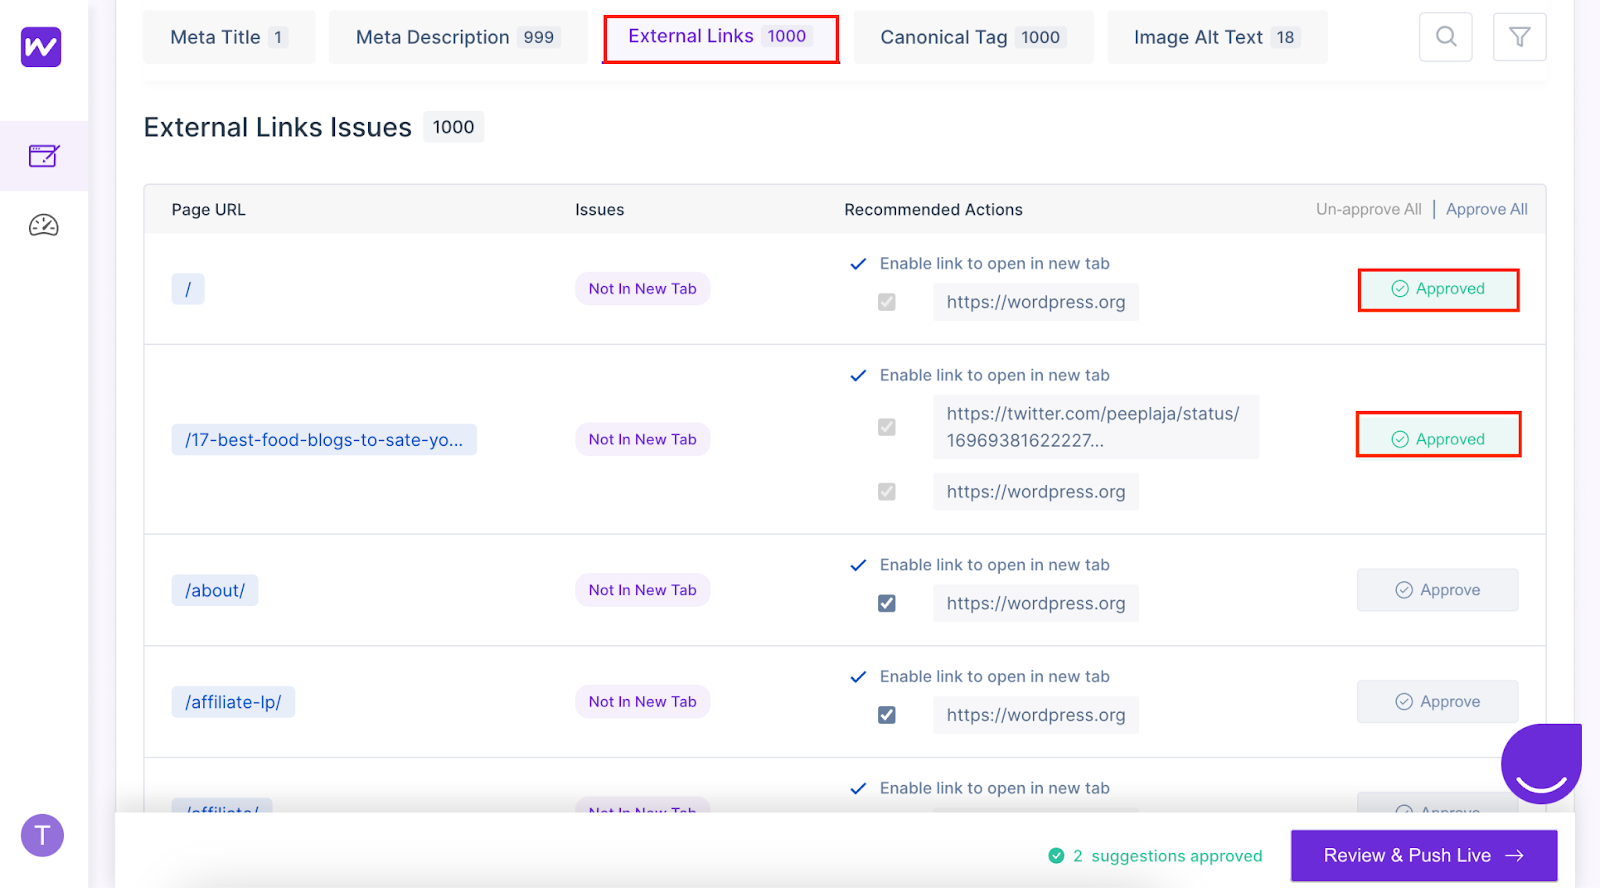
Next, head onto the ‘External Links’ issue.
External links direct users to a webpage or resource that is hosted on a different website or domain than the one where the link is located.
There is only one type of issue you can face -
Not in a New Tab, in which case, the link(s) does not open in a new tab.

STEP 23
If only a single link is present, you can directly click ‘Approve’.
STEP 24
If multiple links are present in a URL, either you can approve all the links or you can select by checking on the tick box.
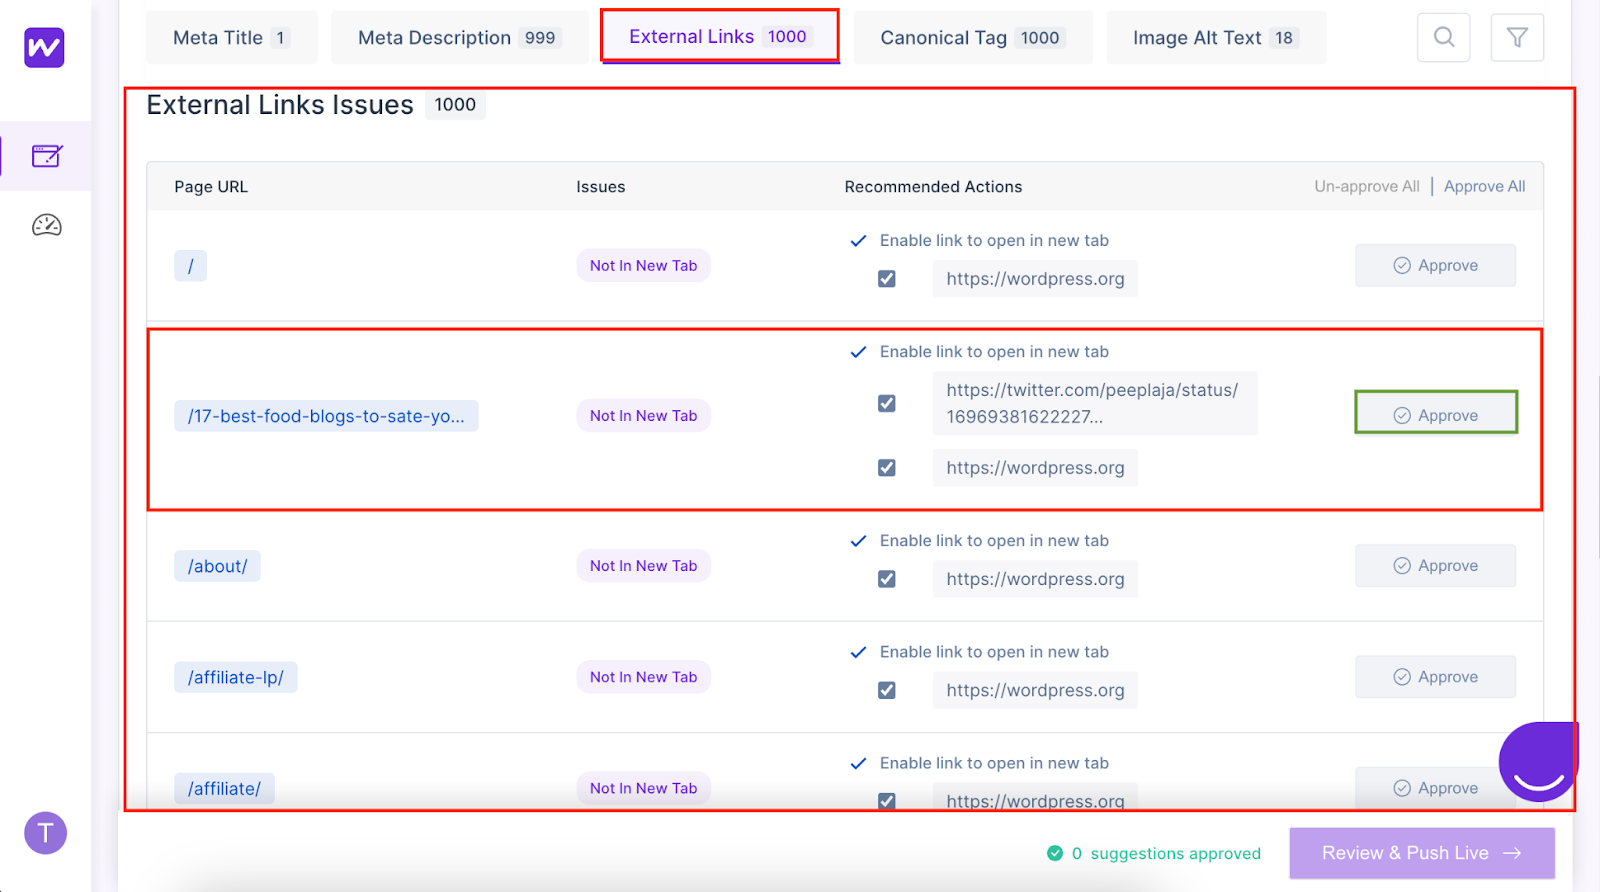
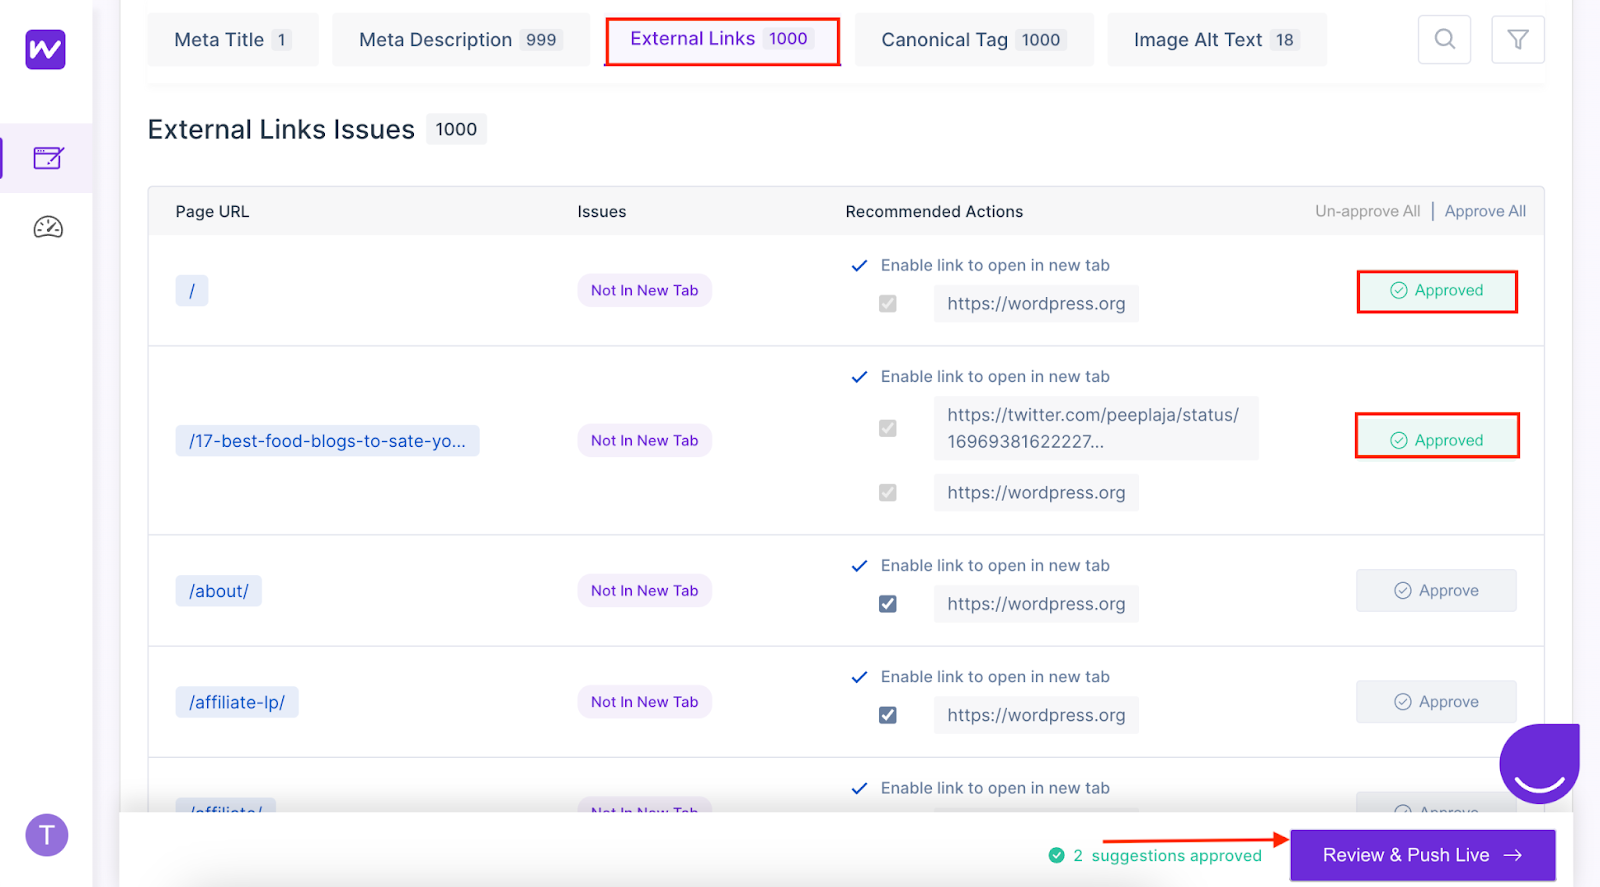
STEP 25
Next, click on ‘Approve’
STEP 26
Click ‘Review and Push Live’
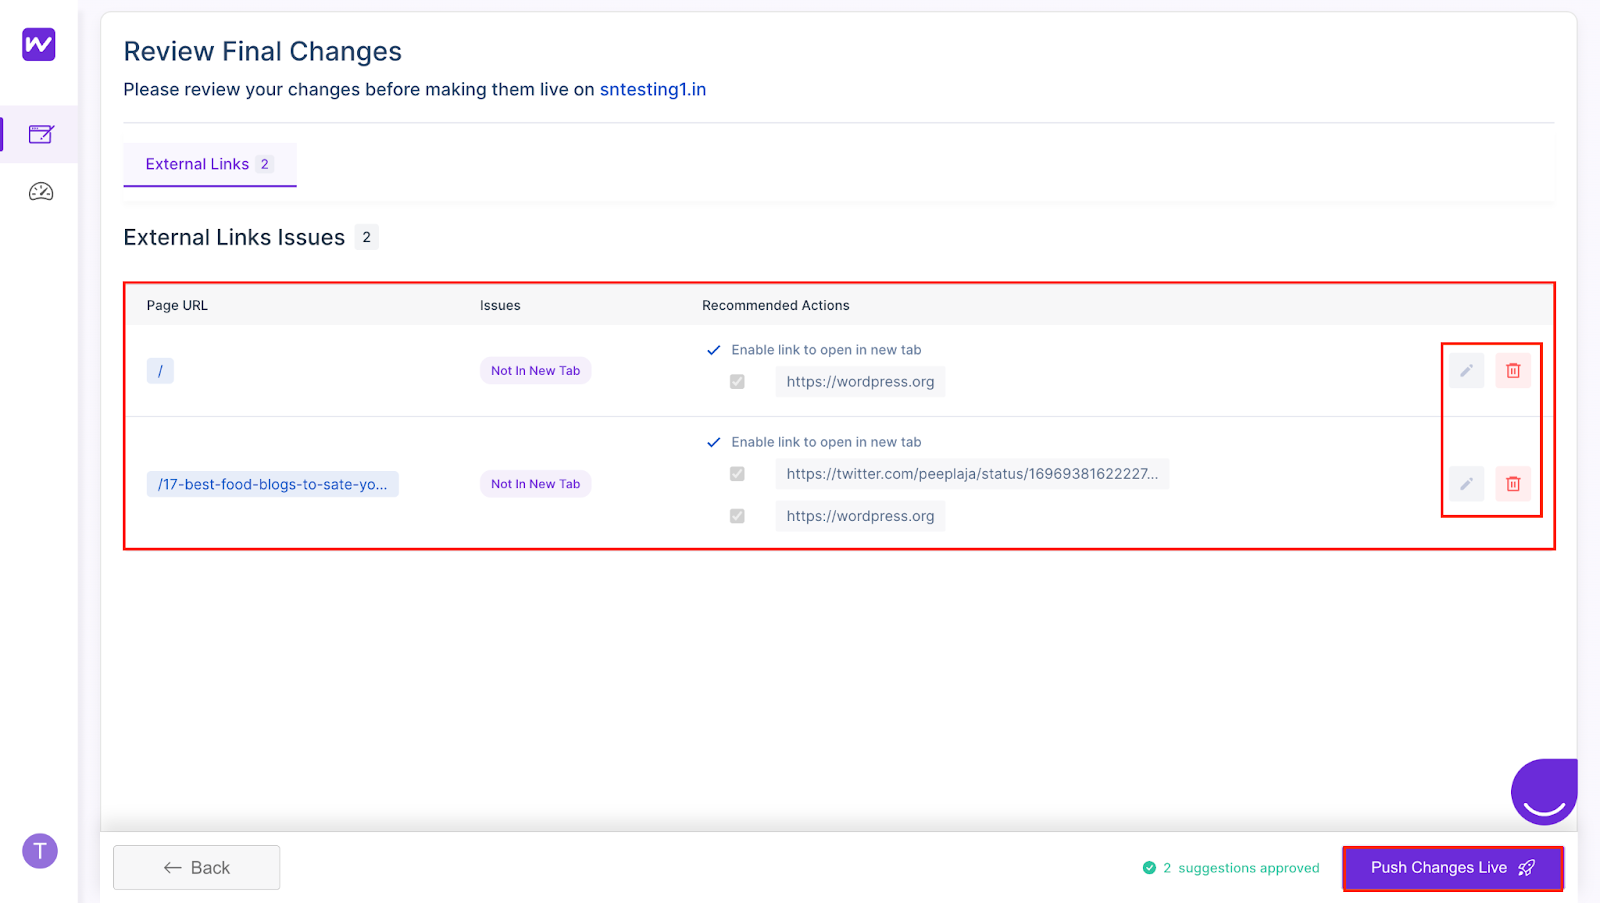
STEP 27
You can then review your final changes and click on ‘Push Changes Live’.
STEP 28
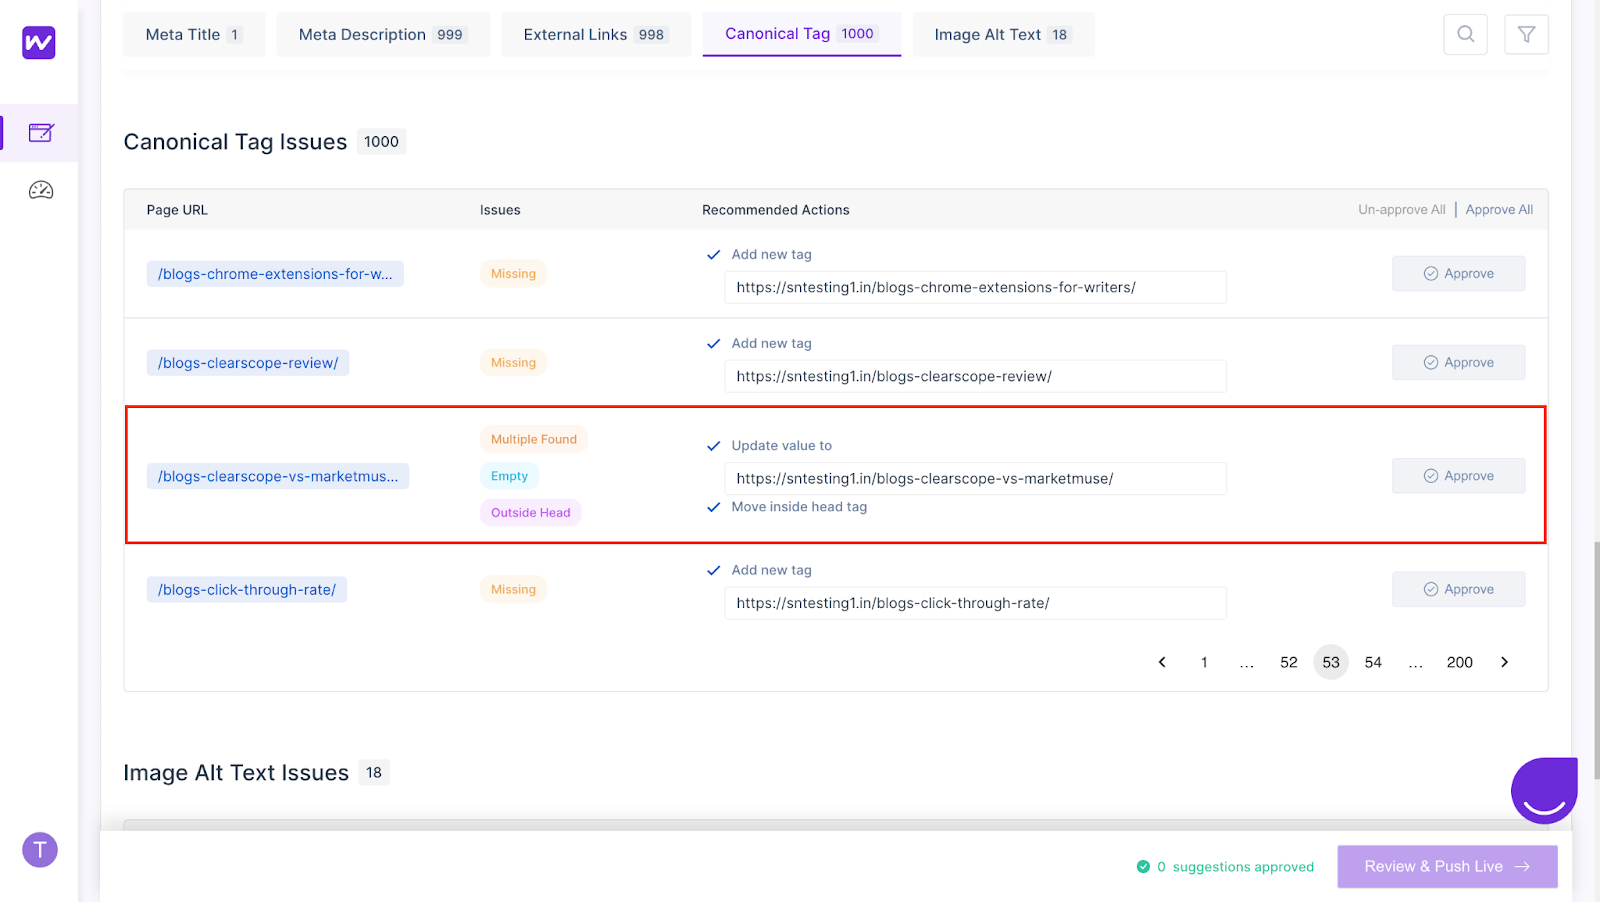
Now, let’s fix a ‘Canonical Tag’ issue.
Canonical tags are HTML elements that enable website owners to indicate to search engines the preferred version of a web page when multiple versions exist.
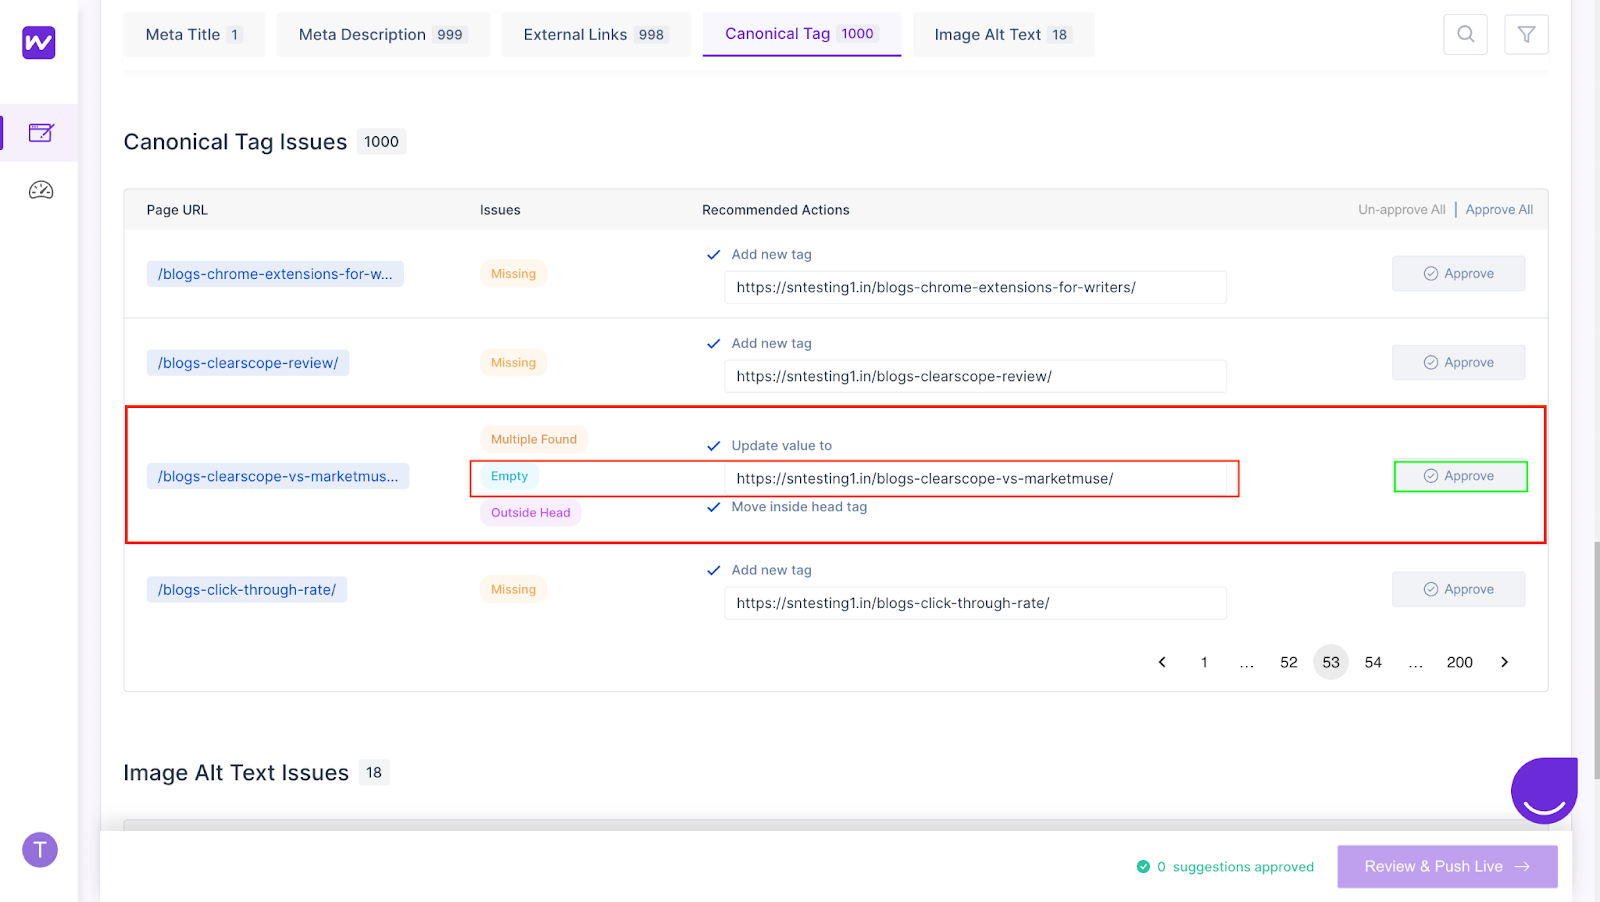
There are 4 kinds of Canonical Tag issues that Webtune aims to fix - Missing, Empty, Outside Head, and Multiple Found.
In this case, let’s tackle the ‘Empty’ Canonical Tag issue.
STEP 29
Our AI generates canonical tags for you. If you like it, simply click ‘Approve’. Or, edit the canonical tag as per your preference.
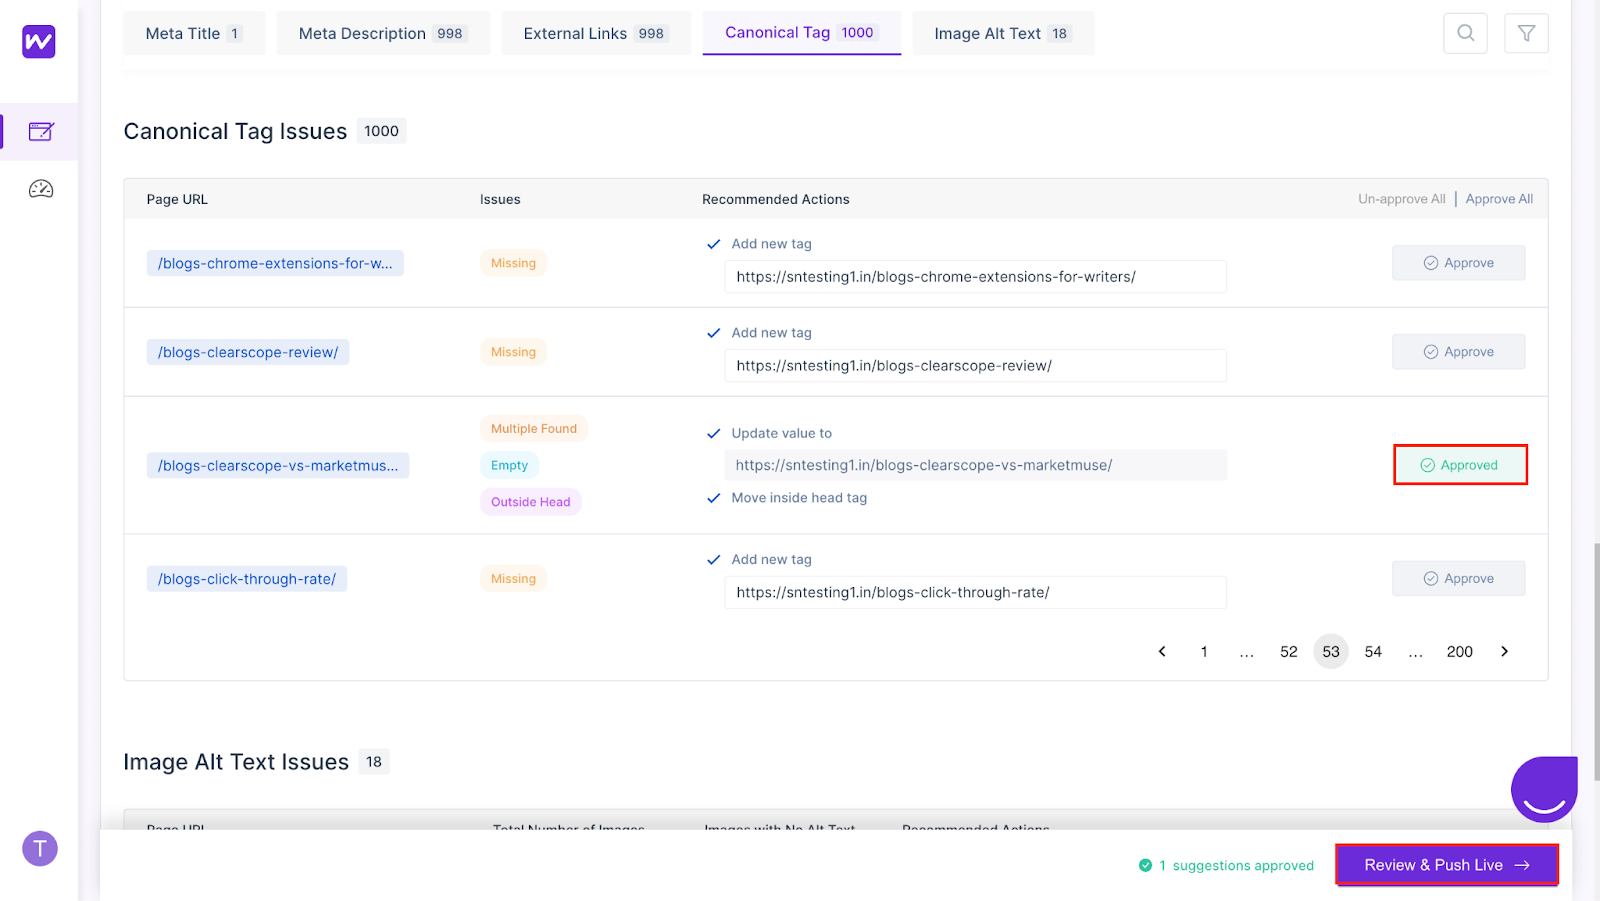
STEP 30
Next, click ‘Review and Push Live’
STEP 31
On the redirected screen, you can review your final changes. If needed, you can further edit it over here, or directly click on ‘Push Changes Live’.

Want to know how to fix the other 3 Canonical Tag issues? Read this dedicated article for the complete walkthrough. What Are Canonical Tags and How to Tackle Their Issues?
STEP 32
Finally, let’s fix the ‘Image Alt Text’ issue.
Image Alt Text, also known as alt attributes or alt descriptions, is a short description of an image that you can add to the HTML code of a website.
There is only one issue here - Missing Alt Text, which occurs when the alt attribute is missing for an image on a website
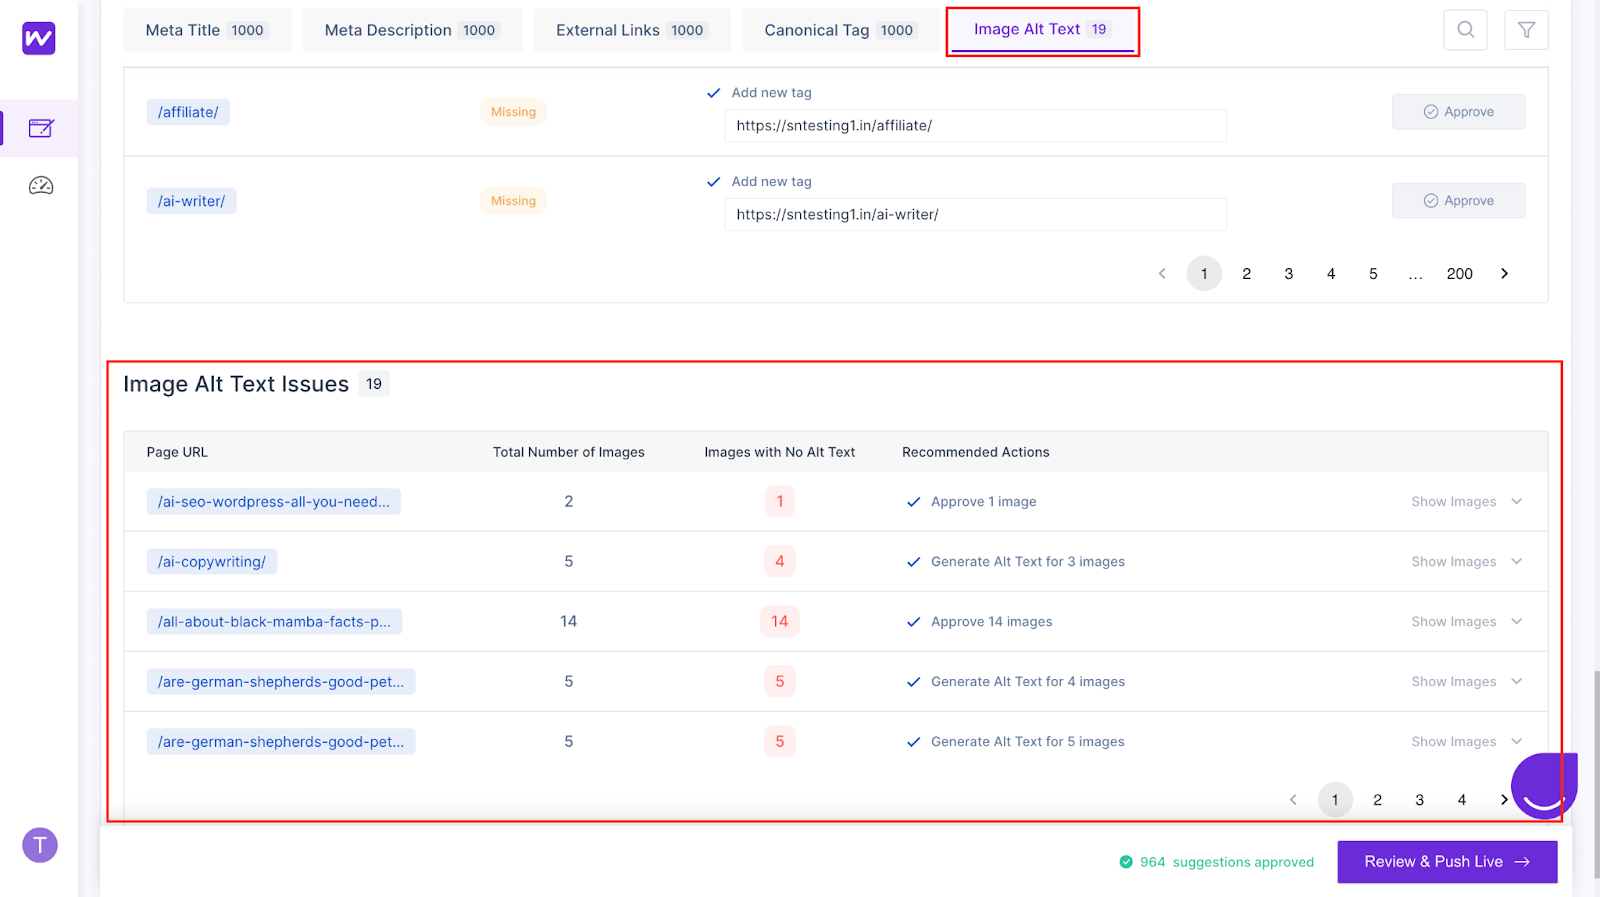
STEP 33
Click on ‘Show Images’.
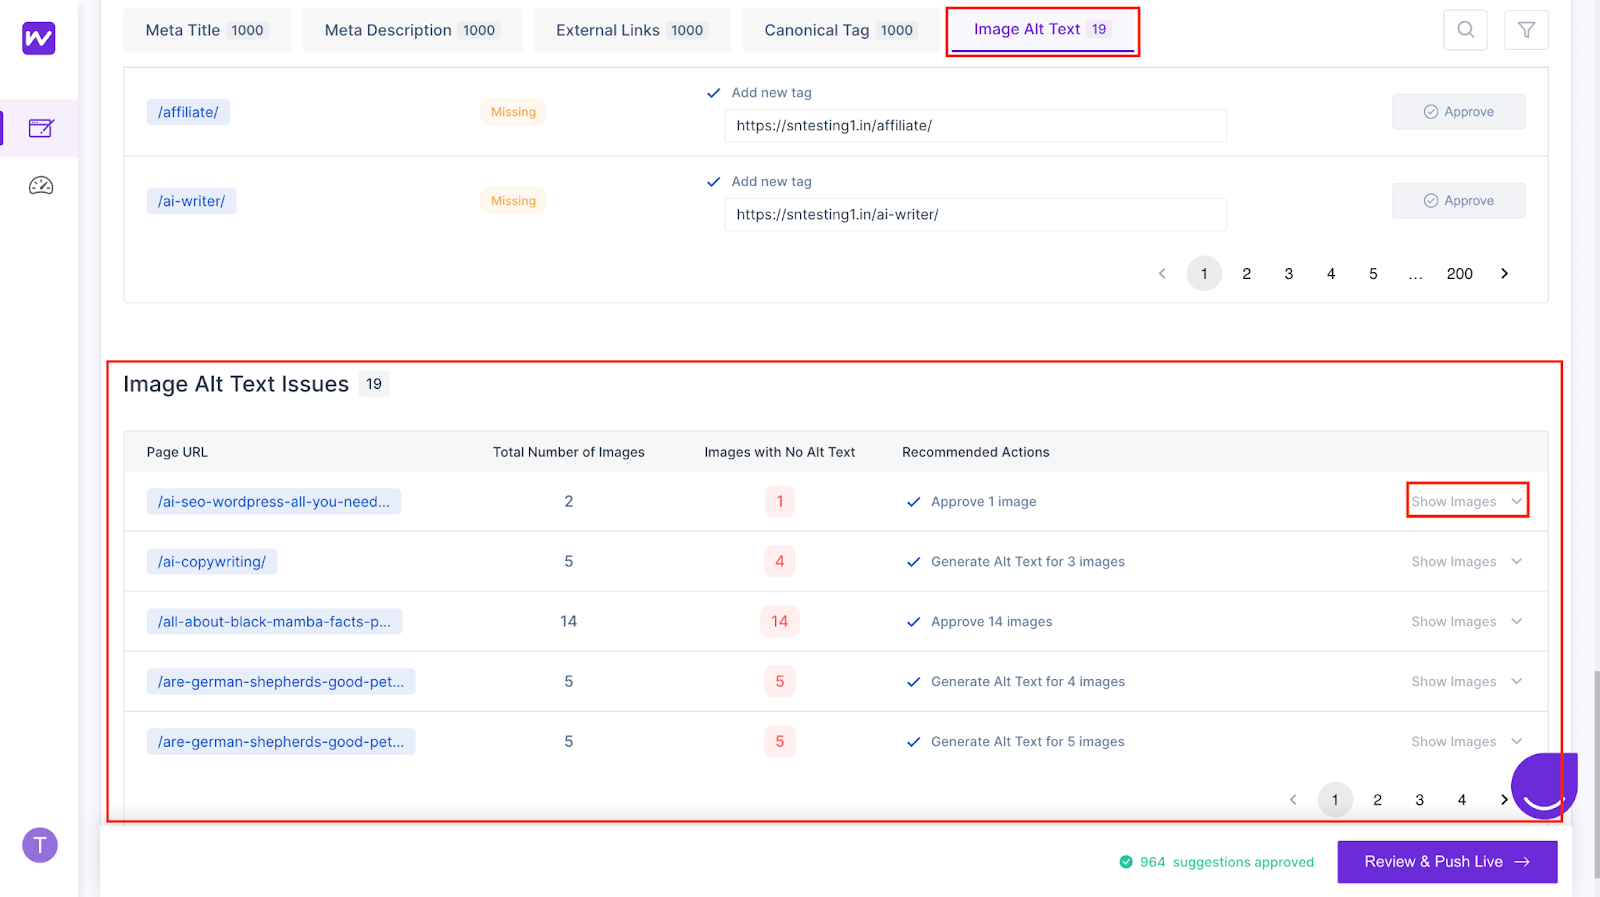
STEP 34
The list of the images with the issue will appear here. Simply click on the dialogue box and write the Image Alt Text as per your preference. Once done, click ‘Approve’.
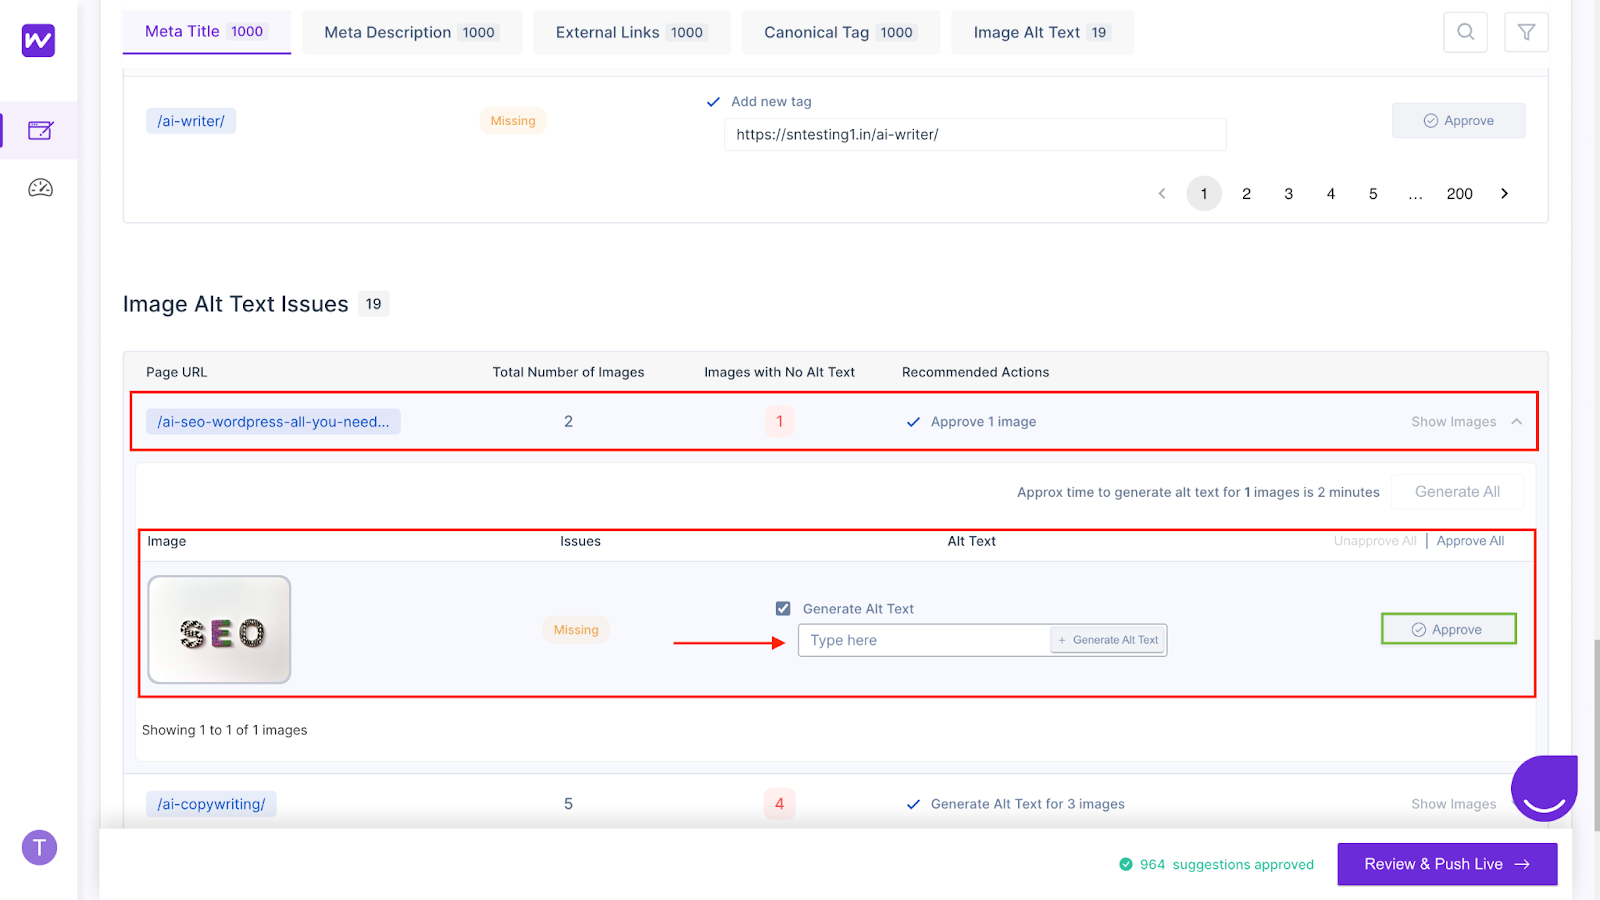
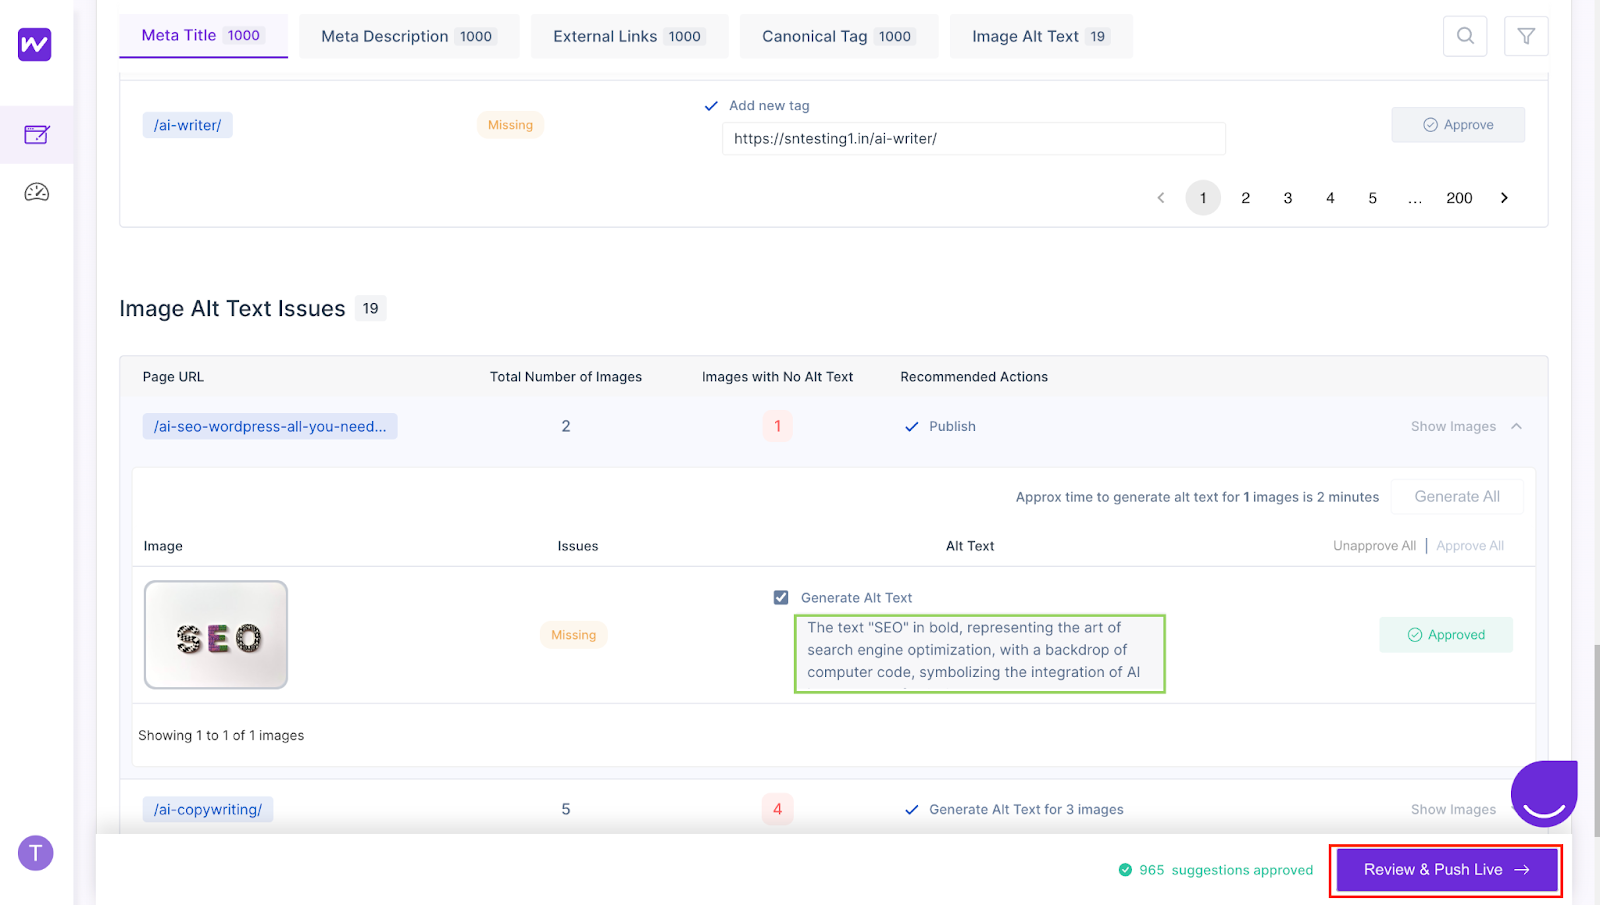
STEP 35
In case you want the AI to write it for you, click ‘Generate Alt Text’. You can also regenerate the alt text here.
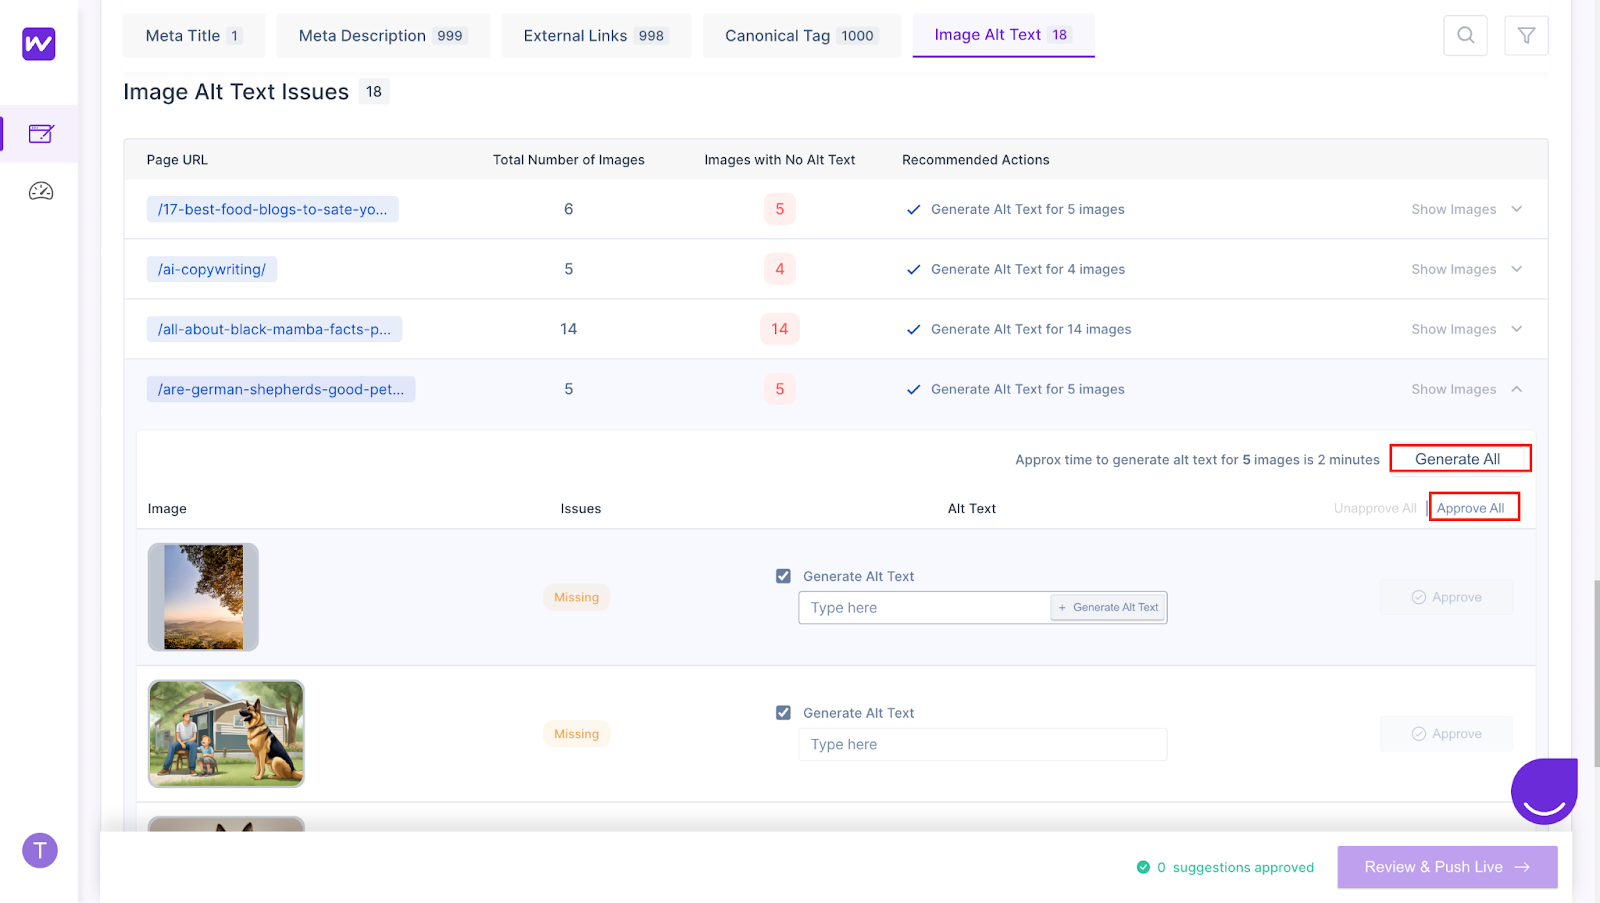
STEP 36
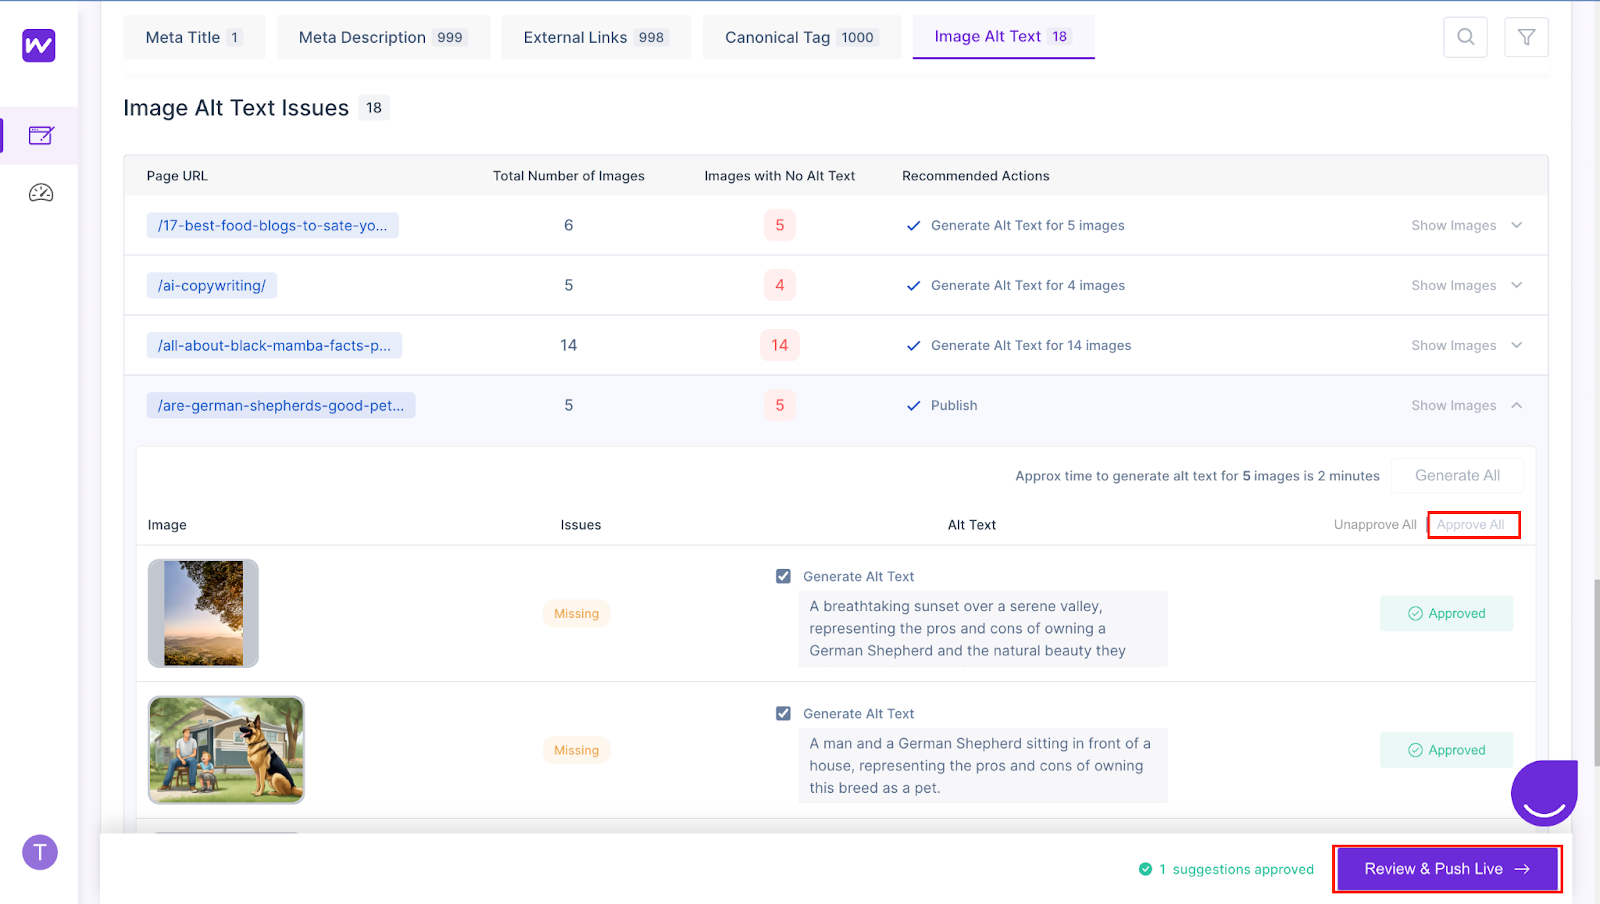
If you wish to generate all the suggestions at once, click on ‘Generate All’. Else, just ‘Approve All’.
STEP 37
Next, click ‘Review and Push Live’
STEP 38
You can then review your final changes. If needed, edit it over here, or click on ‘Push Changes Live’.

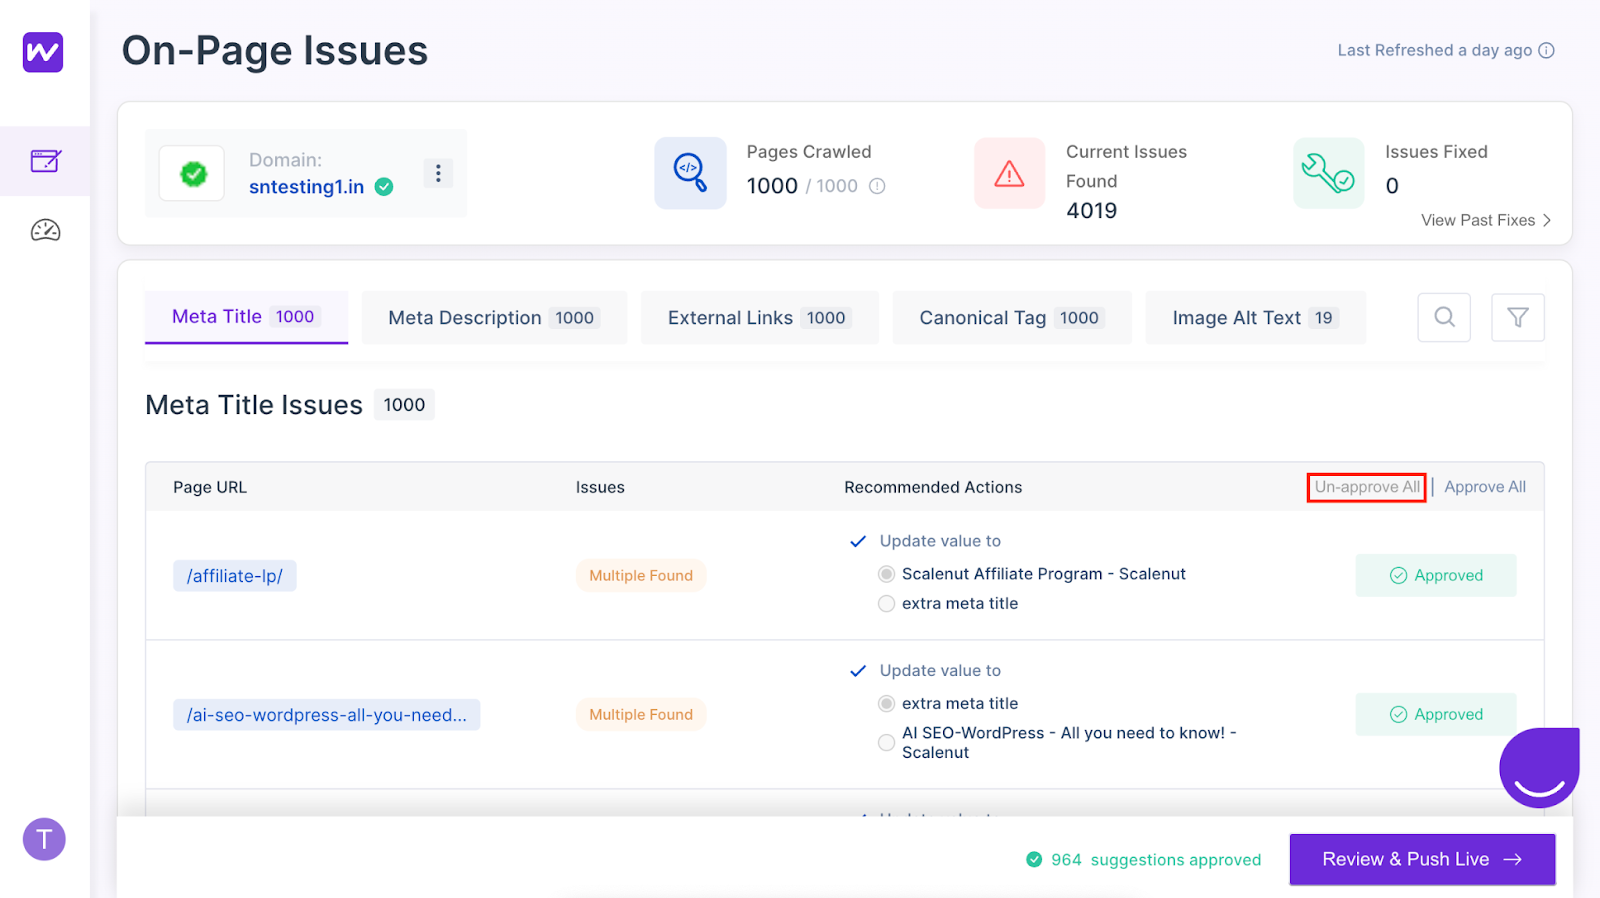
PLEASE NOTE: You also have the option ‘Un-approve All’ to undo the changes you’ve made all at once for each issue type.
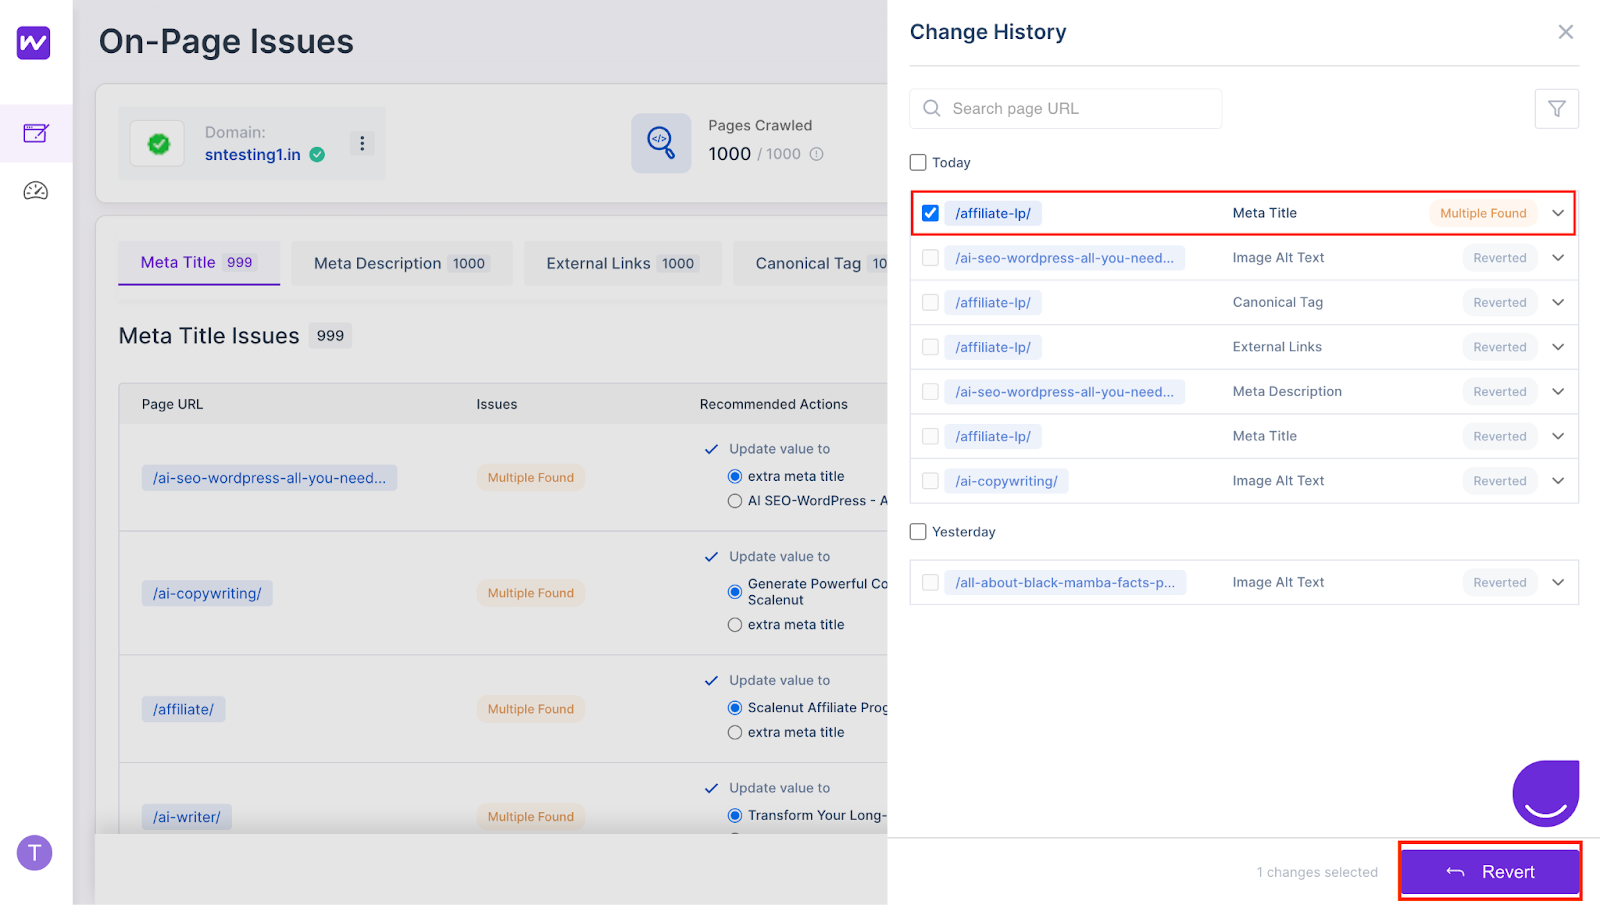
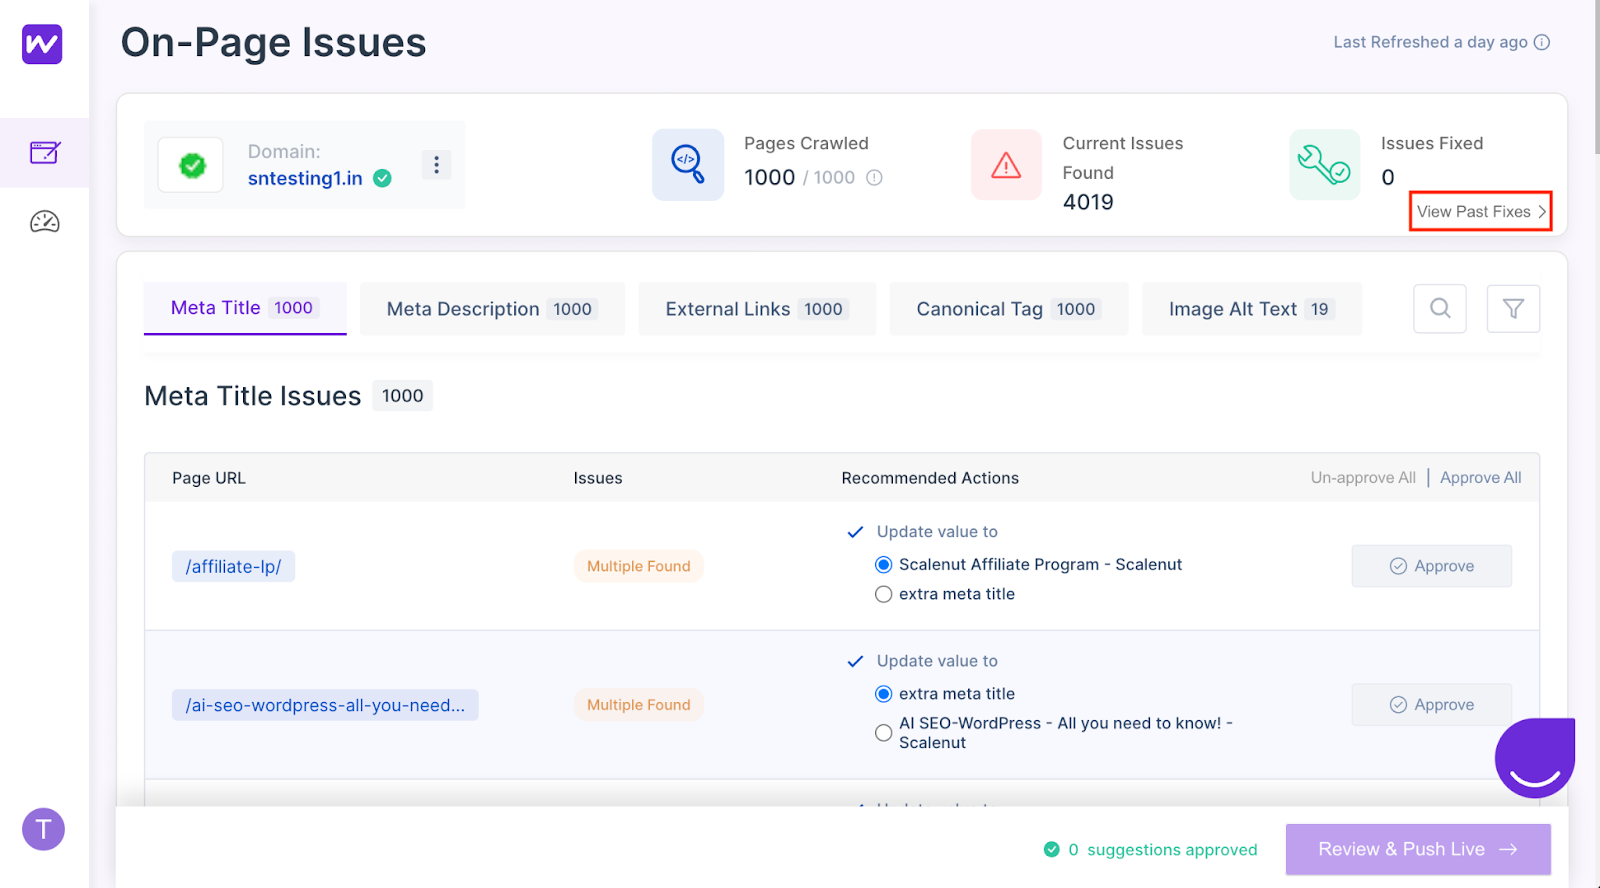
View Past Fixes -
To view the changes you’ve made, click the ‘View Past Fixes’ button. Here, you can see everything you’ve fixed and also revert them, if needed.
To revert fixes, simply select the fix and click ‘Revert’.